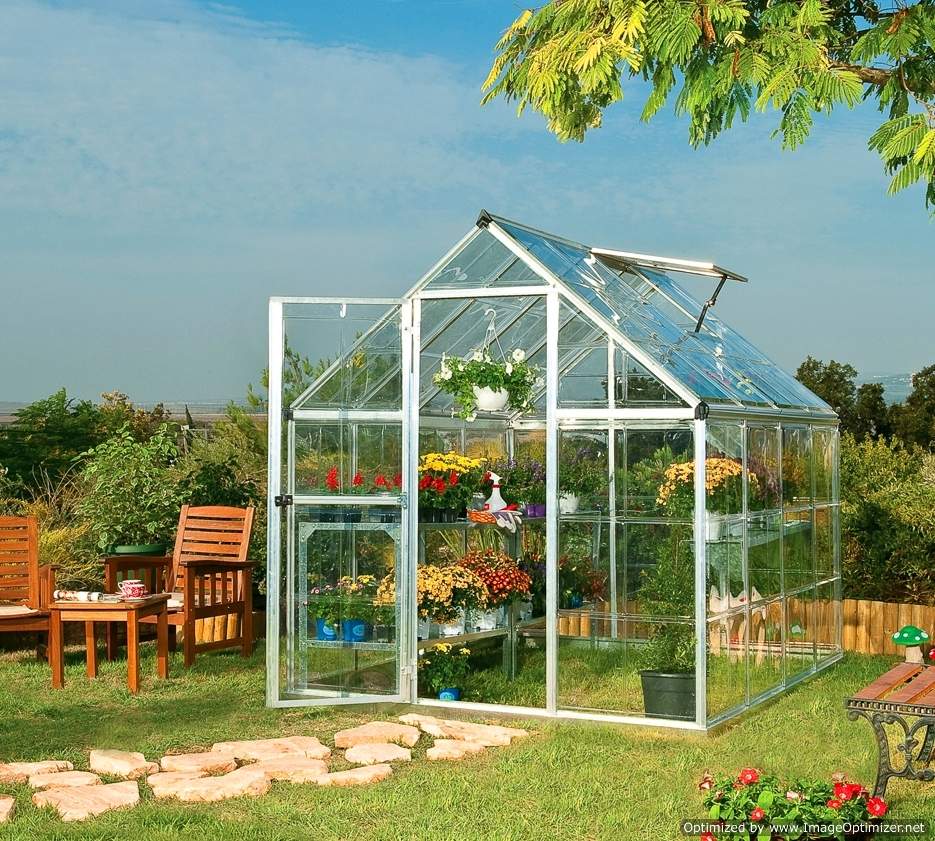
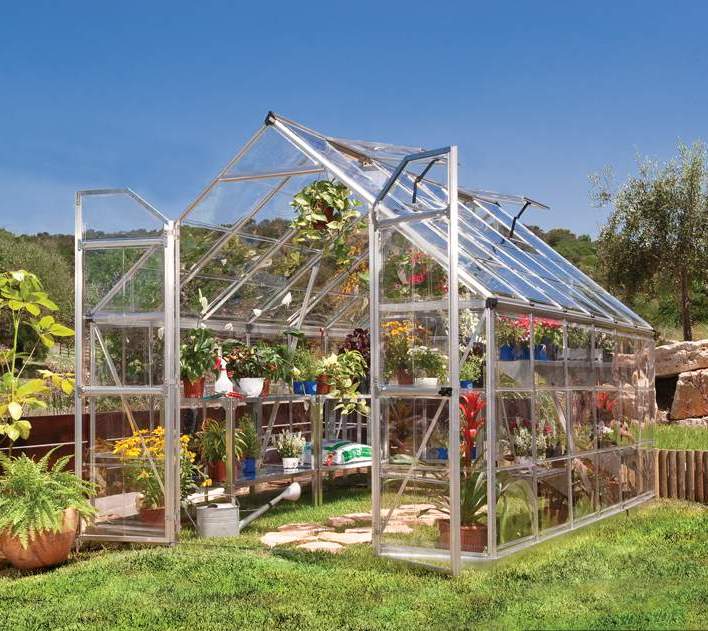
A unique plant to grow in your greenhouse, the Cape Gooseberry

A unique plant to grow in your greenhouse, the Cape Gooseberry

Remember eating Cape Gooseberries when you were a child? Popping open the papery cases for that little orange cherry sized fruit….

Have you tried Cape Gooseberries? I’ve grown this plant year round in my greenhouse with great success – it can get a bit big but it’s easy to cut back. Little ones love popping open the paper cases to reveal the orange cherry sized fruit inside. Brings back memories of when I was a child…. and great to snack on when working in the garden as an adult.

I’ve also had the same capsicum plant growing for the past three years in the greenhouse. It seems to always have fruit, year round – including winter. It’s a smug feeling to pick them for recipes in winter and cost effective by not having to replant every year!

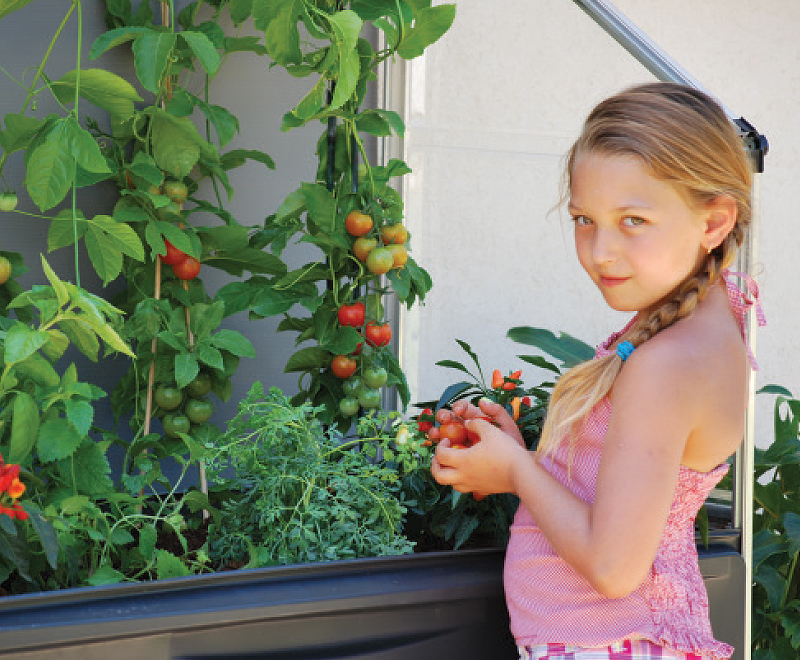
Everyones favorite, tomatoes in the greenhouse (as well as outside) give a longer growing season. They are earlier to bear fruit and the plants last longer into Autumn/Winter. With such a wide range of colours, sizes and flavours – it’s hard not to get excited!!

Why not pop in some cucumbers, chilies, eggplant and basil, too? For areas in Australia that do get frost, this is one way your harvest can be extended.

There are lots of delicious recipes available for the Cape Gooseberry.

There are lots of delicious recipes available for the Cape Gooseberry.

Maybe you might like to plant some NZ yams (oca) in the greenhouse during autumn if your summer temps are too hot to plant them outside in Spring/Summer and you get frosts in winter. See our previous blog link on growing yams (tubers can be purchased from Tasmania from June-Aug/Sept) for storage until planting.

Now is a good time to purchase a greenhouse, get it set up and give your veg seedlings a head start. Click here to see our wide range of greenhouses.

Last month of winter – Bring on Spring!
So, what do you like growing in your greenhouse?Octave_8x12_Web2-Optimized


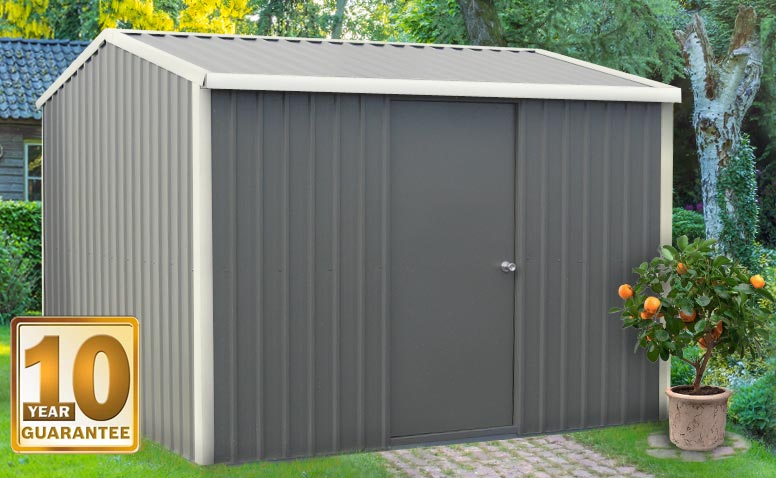
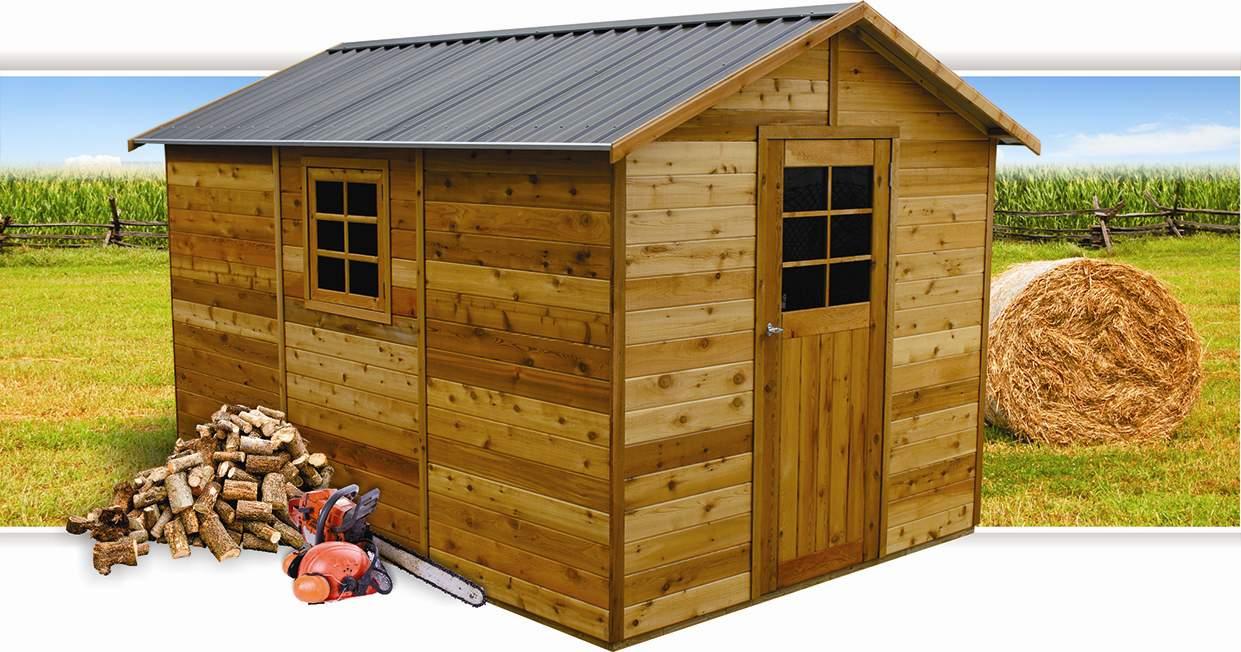
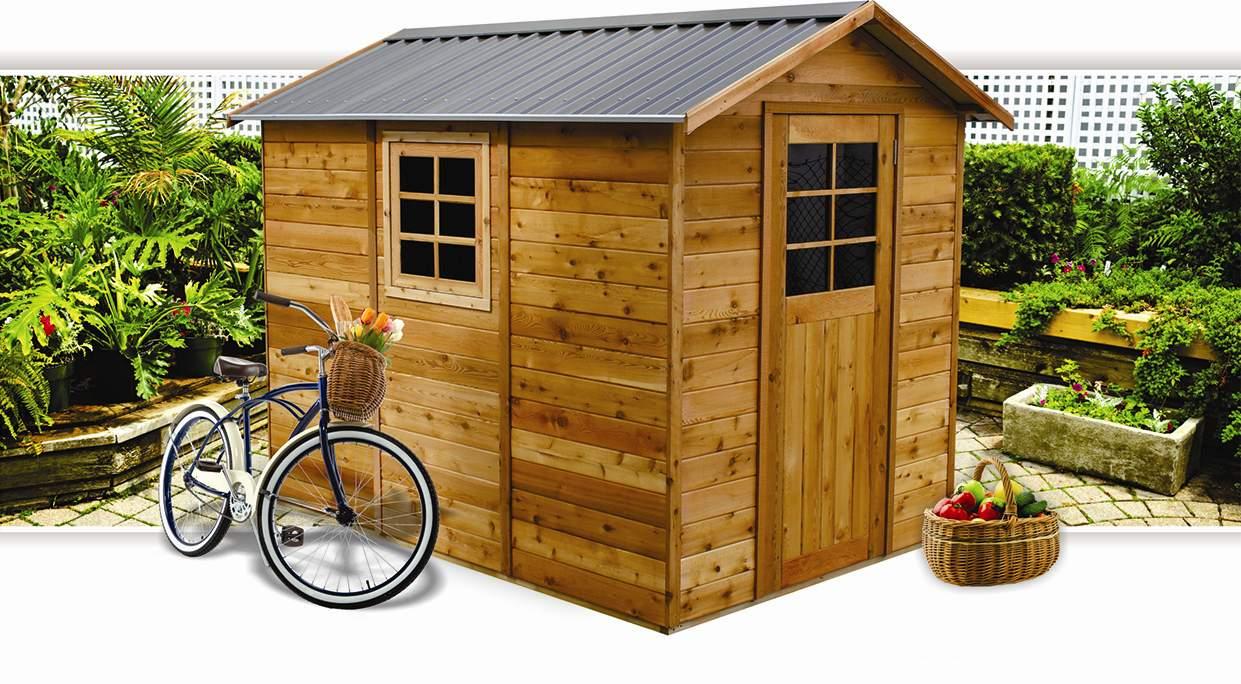
Our heavy duty, steel garden shed

An Australian shed built to last

HEAVY DUTY GARDEN STORAGE TO LAST A LIFETIME!

Our new, premium, galvanised frame, steel garden shed is built and designed for those that want the best. Are you put off by all the cheap, imported sheds currently on the Australian market? Well we have a quality, Australian made product that’s sure to impress!

Outdoor storage options are many and varied – ranging from the very low-cost cartonised sheds available from the hardware chains through to custom-built brick and stone buildings designed to match the house. At the end of the day, though, what most people are looking for is a cost-effective and secure solution to getting the extra storage space they need.

One important criterion in the selection process is the value of goods to be stored. It doesn’t make a lot of sense to keep valuable tools and equipment which can add up in value to thousands of dollars in a poor quality, leaky shed which can be easily broken into. So weatherproofing and strength are major factors which need to be considered. The HD3030 is designed with these features as core parts of the product.

Appearance and longevity is also critical – a well-designed and built garden shed adds value to your property as well as fulfilling its primary role. This shed is designed to last and bring a functional beauty to your home.

The ACERMAX HD3030 HEAVY DUTY GARDEN SHED ticks all the boxes. Supplied in easy to assemble kit form, it is a fully-framed Color steel unit with a lockable door.

TO ORDER YOURS CLICK HERE

Currently we have these available with a FREE SKYLIGHT, just mention this in the order comments box.


gazebo-kit

Looking for a quality gazebo kit that won’t break the bank?

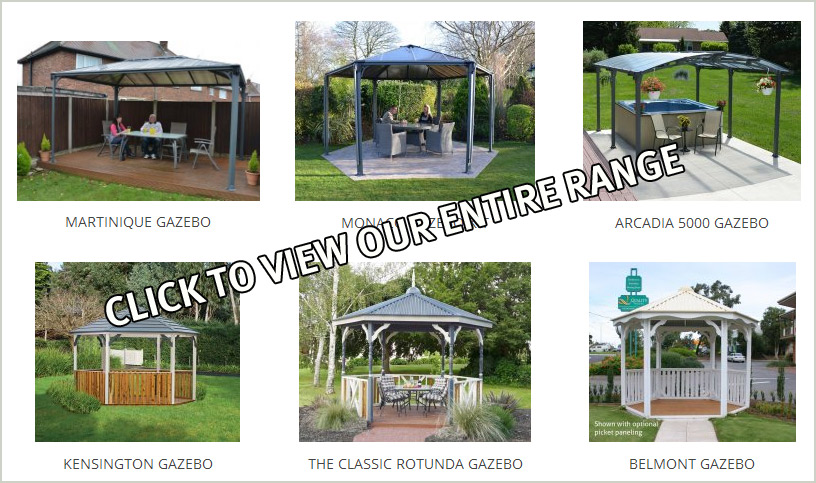
It is hard to beat relaxing outside enjoying a quiet meal with a glass of your favorite drink – and it is especially enjoyable when you don’t have to worry about the hot sun or the possibility of a shower of rain … Ever considered a gazebo kit? We have a wide range at LANDERA, click the image above to view them. Below is some extra information about one of our styles:

 gazebo kit

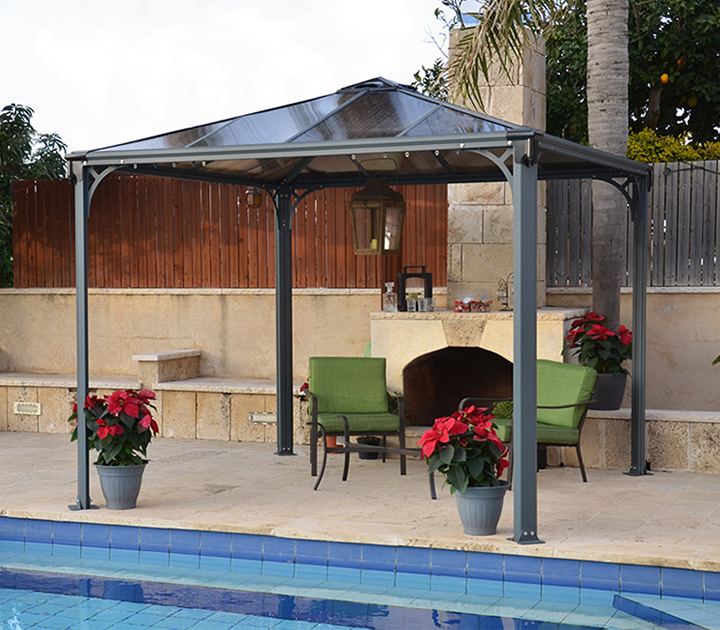
PALERMO 3000 GazeboThe new GAZEBO range from Palram is available as quality DIY gazebo kits which are easy to assemble, maintenance-free and very reasonably priced. The units are manufactured from heavy gauge aluminium extrusions and steel bracket components which are powdercoated in an attractive Basalt Grey colour, and the roof glazing is a virtually unbreakable 6.00mm Twinwall polycarbonate sheeting which is UV-stabilised.

Other features include a specially designed ventilated canopy top which allows smoke from the barbeque and humidity to escape and integrated gutter heads with discreet downpipe connections. An anchoring kit is supplied and the gazebos can be installed on a range of surfaces including concrete slabs, paving and timber decking.

As a classy and functional addition to your outdoor living area, the PALERMO GAZEBO units are hard to beat!


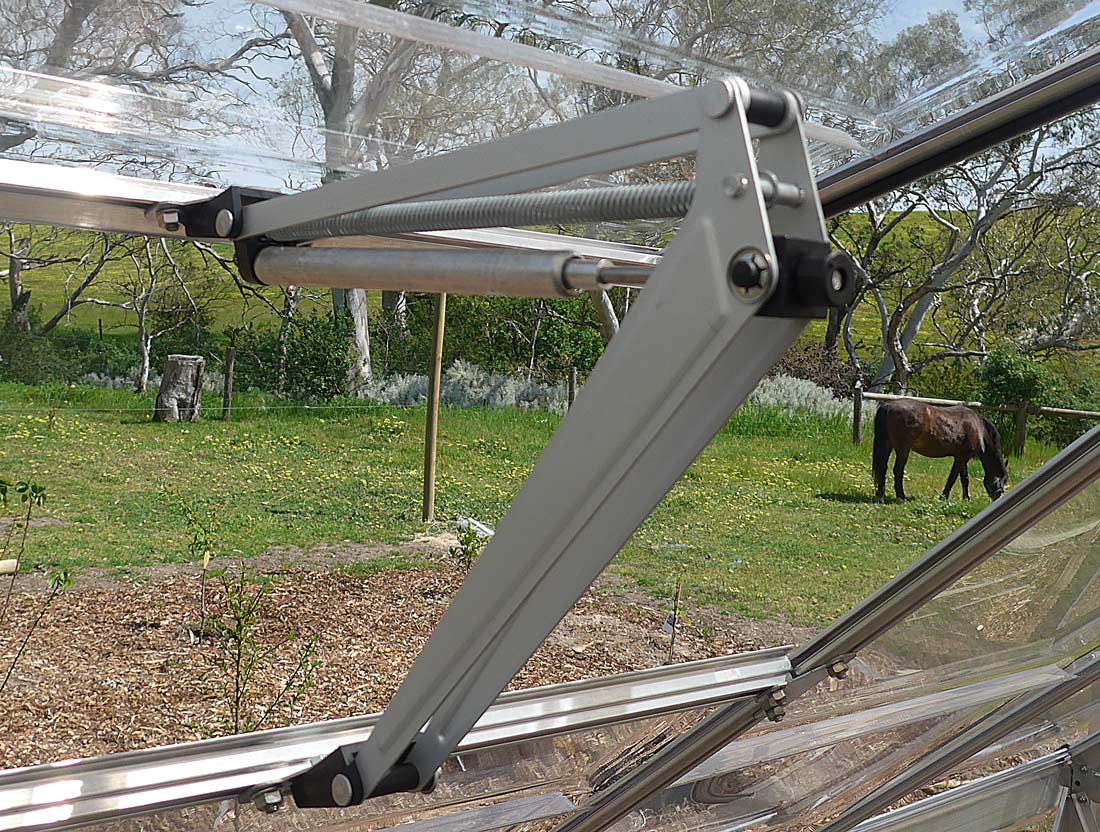
auto vent arm greenhouseIf buying a greenhouse, you really need an auto opening window. They provide the following benefits:

  • Regulate temperature
  • Promote pollination
  • Control pests
  • Provide fresh air
  • Reduce mildew
  • Regulate humidity
  • Save time and effort

After a few hot days over the 30 degree mark, I remember what Summer is like again. While I enjoy Summer type weather, it’s also nice to retreat into the cool of the house. Unfortunately, the plants in our garden don’t get that cooling effect until later in the day/evening.

While watering the seedlings in my Maze Silverline greenhouse, I realised it’s time to put the shade cloth over to protect my seedlings and plants from the fierce heat of the afternoon sun. This combined with air flow helps cool my greenhouse down.

My favourite feature of this greenhouse is the automatic opening vent arm in the roof. The arm actually opens the roof vent as the suns heats up during the day. Later as the day starts cooling, it  closes the window. The arm has wax inside a sealed piston and as it gets hot the wax melts and expands, opening the window. The wax hardens again as the ouside temperature cools and the spring closes the window shut. This is a brilliant way to ensure your tomatoes or other plants don’t cook in your greenhouse if you forget to open the vent/door in the morning. You can relax knowing that your plants are being looked after… wax on, wax off!

Our arms are fully adjustable to allow different opening and closing temperatures.

Our Maze/Silverline greenhouses also have a magnet that holds the door open to allow extra ventilation during the day if you wish. But I like the idea that you can add another vent into the roof once your greenhouse has been installed if you desire. It is a relatively easy job to slide another vent (with auto arm of course!) into the roof and then you have cross ventilation available at all times. If you are worried about adding another vent, the additional vent you purchase does come with instructions to retro fit.

The Silverline greenhouses have many options available, so you can add different items when you need them. There are two types of shelving to attach to the walls, two and three tier benches, bench/table unit, dripper system, etc.greenhouses

Another favourite is the trellising kit designed to make your tomatoes and cucumbers more manageable to maintain and pick in the greenhouse. They make everything look tidy and you have control!

I enjoy the fact that I don’t need to try and protect my produce from the pesky feathered and furry bandits who would devour my produce very quickly if they could. There’s nothing worse than finding your tomatoes pecked over or gone after spending your valuable time growing time. With a greenhouse – that is no longer a problem.

Check out the many greenhouse’s and accessories available and get ready to enjoy your Spring/Summer produce for longer!

Call us to learn more, we know greenhouses!
1300 651 671


Yams, delicious but not readily available in Australia.

Yams, delicious but not readily available in Australia.

Something a little unusual to grow in our greenhouses – the NZ yam. These are a very tasty tuber, unknown to most Australians.

Having lived in Australia for 16 years after moving from New Zealand – I’m always keen to get hold of commonly grown NZ fruits and veggies that are hard to find here in Adelaide. I have fejoas and banana passionfruit that are okay with the light frost we get here – but what about NZ yams or Oca as they are also known as?

People that haven’t tried them before probably think they are a potato/taro type of vegetable – but they are not. In fact, it’s good to expose them to the sun for a few days after harvesting to increase the sweetness level (unlike potatoes that turn green and poisonous). They range in size, the average being about  4-5cm long and 2cm wide – like fat squat fingers and have a slight lemony taste. They can be used raw in salads, steamed or best of all (in my opinion) roasted! They don’t need to be peeled and become slight chewy on the outside and soft on the inside.

The plant itself  disconcertingly, looks a lot like the soursobs! Although, they are in the same family – you won’t have any problems with them spreading out of control. In New Zealand and other cooler places like Tasmania, yams are grown over the Spring and Summer to be harvested in Autumn/Winter. Unfortunately, yams really dislike days when the temp gets into the mid 30’s. So to beat that problem, I tried the following….

I ordered my yams off the internet from Tasmania in August. I then stored them in a container with a tight plastic lid in the crisper section of my fridge. They stayed there until I planted them out in the beginning of March. As frost will kill off the foliage of yams (we get frost where I live) I planted them into the green house. The tubers had sprouted a little in the plastic container, so I had to be careful not to knock the sprouts off when I put them into the ground. I placed them about 10cm deep in soil that I had added complete garden fertiliser. Within a couple of weeks the leaves were appearing above the ground. I mounded the soil up around them to encourage tubers to form higher up the stems. The plants grow to about 30cm high and wide which is perfect for the dripper watering system I use in the greenhouse. They seemed resistant to a lot of diseases and pests.greenhouses

By the end of June my plants had pretty much died down, although I didn’t dig them up until 2 weeks later. I was thrilled to find lots of yams underneath the soil.  There were both the pink and yellow varieties. I found that the largest yams planted had the best yields. I did notice that a lot of the yams were on the small side 2-3cm instead of 4-5cm. But the after having a meal of them, it was decided that the smaller ones tasted better! I kept the largest ones aside to keep in the fridge and plant out next year. Without a greenhouse this wouldn’t have been a possibility for me. I’m actually hoping to buy another greenhouse to dedicate to them, as they don’t like growing where the potato family has grown before (including tomatoes). Some may question the fiddling around with storing, etc in order to grow these vegetables – but a lot of Kiwis in Australia would love to get their hands on some yams!

Landera is currently having a sale on our greenhouses and greenhouse accessories, we recommend the Silverline 6×8 to have a try at growing your own yams, if you wanted something cheaper there is always the double cold frame which can be moved and is good for smaller spaces.

Definitely, worth a try!


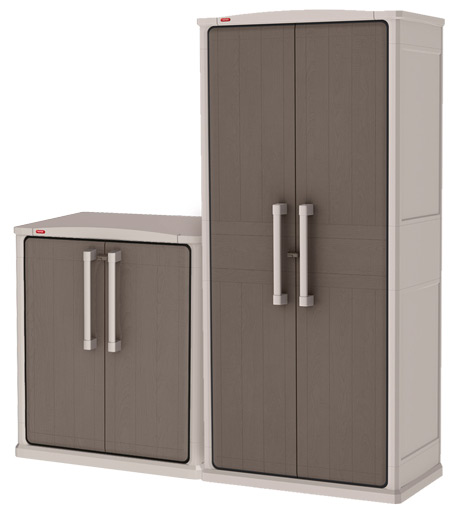
optima-baseNewly released is the Keter Optima Wonder Outdoor and the Keter Optima Mini.

The Optima Outdoor was released a few weeks ago and is proving very popular. It is a modern, all weather resin outdoor storage cabinet designed to take advantage of vertical space in your patio/backdoor area/workshop or garden shed. It has a reinforced roof and elevated base to hold heavy items that can be enclosed in a safe environment and look tidy at the same time.

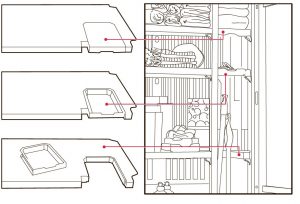
The noteworthy difference with other outdoor storage cabinets is the way the shelves can be modified to suit different storage items. The cabinet shelves can be adjusted so that the cabinet can hold brooms or long handled tools, as well  as shelving for your other products.

Keter-optima-wonder-outdoor_03

Special patented shelving system.


Just remove a section of each shelf you desire to fit in the item. This also means you have handy little containers left over to store bits and pieces. We have a video of how this works on our stores product page.

The door seal makes sure you get better protection against dust, water and humidity. With the option of four shelves and the base (each shelf holds up to 30kgs & the base 50kgs) there is plenty of space for that ongoing storage problem. The modern unit is well designed with metal hinges and a lockable handle (extra security)  and the two tone colour is beige and taupe – which complements most homes. The external dimensions are:  80.5 cm Wide x 47.3 cm Deep  x 177.8 cm high.

These units have been purchased to store chemicals, garden implements and supplies, patio storage, garage tools, back door storage, pet feed, shoes, kids school bags and play/sports equipment. Really the list could be endless!

Just about to be released is the Keter Optima Mini (also know as the Optima base). Available for pre-order now, the Optima Mini is designed to be an inconspicuous storage cabinet in its own right or as a partner with the Optima Outdoor providing that convenient worktop or resting spot for checking storage items. The external dimensions are: 80.5 cm Wide  x 47.3 cm Deep  x 91 cm High.

Time to get that clutter sorted and make your place look great at the same time!

To order yours or to view more information, click here to visit our outdoor storage page.


leaf-compost

Did you know leaves can have twice the mineral content of Manure?!

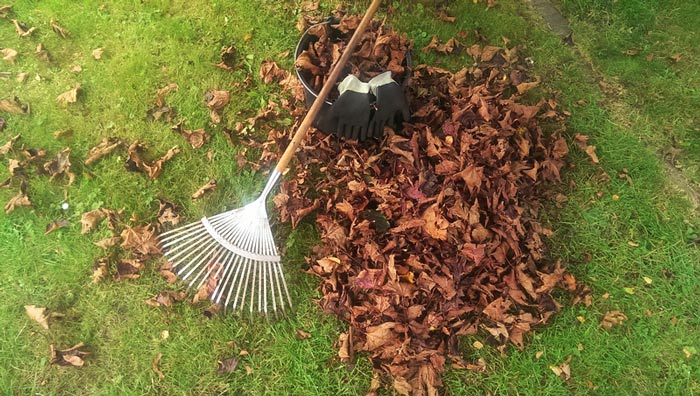
Don’t we love the rich warm colours of the autumn leaves at this time of year? But as we head into winter, those leaves can pile up thickly on the ground and turn into a brown slushy mess. That’s okay if it isn’t a walking area for people, but leaf litter on paths and driveways not only looks unsightly but it could cause people to slip and fall.

So what to do with all those leaves? Throw them in the rubbish bin as many do….??

Please don’t! Some may see leaves over their garden as a nuisance and an extra job that they just don’t have time for. But I hope that you will think differently once you realise just how good they really are.

The deciduous (trees that lose their leaves in winter) leaves of most trees have twice the mineral content of manure. They also improve aeration and water drainage/holding capacity of the soil. With lots of beneficial microbes, they make your soil active.

Leaves contain lots of trace elements that your soil needs, such as calcium, magnesium, potassium and phosphorus. Trees are fantastic mining machines, bringing the elements/minerals from their extensive root base right up and into the leaves. It’s estimated that 50-80% of these nutrients end up in the leaves – then, once composted, goes into your soil.

So, how do we make compost using leaves?

Leaves are considered as carbon ‘browns’ in composting circles. To get a quicker decomposition you need to add nitrogen ‘greens’ to the mix. The ratio is about 2 parts leaves (browns) to one part ‘greens’. ‘Greens’ could be kitchen waste or grass clippings. And the finer you chop or shred – the quicker the heap will break down. Chopping and mixing leaves and green ingredients will speed decomposition by four times compared to a whole leaves only pile. A good way to prepare this quickly, is to run your lawnmower over your lawn and leaves. Then it is chopped and already mixed! Five parts leaves to one part manure will get your compost moving compost-tumbleras well.

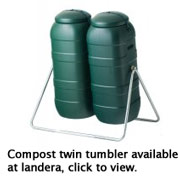
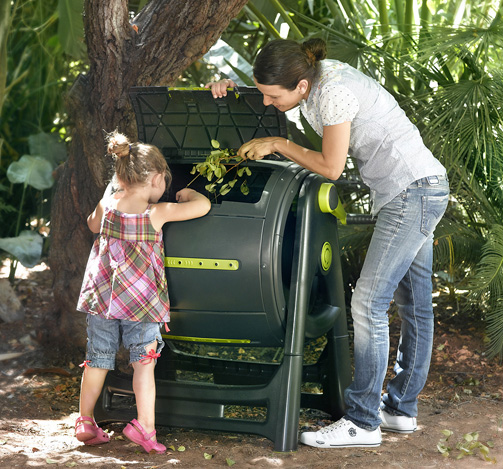
To aid faster decomposition and avoid matting, frequent turning of the leaf compost is a must. This is where tumbling composters make life a little easier. At Landera we sell compost tumblers and the other enclosed, standing unit composters.

Ideally, enclosed composters should be used because they retain the moisture from the materials being composted. They deter pests such as rodents, possums and the dog! It also helps speed up the composting process.

So, the benefit to you is: while you are preparing compost to improve your soil – you are reaping the rewards of exercise (raking and mowing) and getting some sunshine (Vitamin D), so both you and your garden will benefit.

compostingHappy Gardening!
 

Please visit the compost section of our website to view our composter range.


cedar-shed-termite-resistant

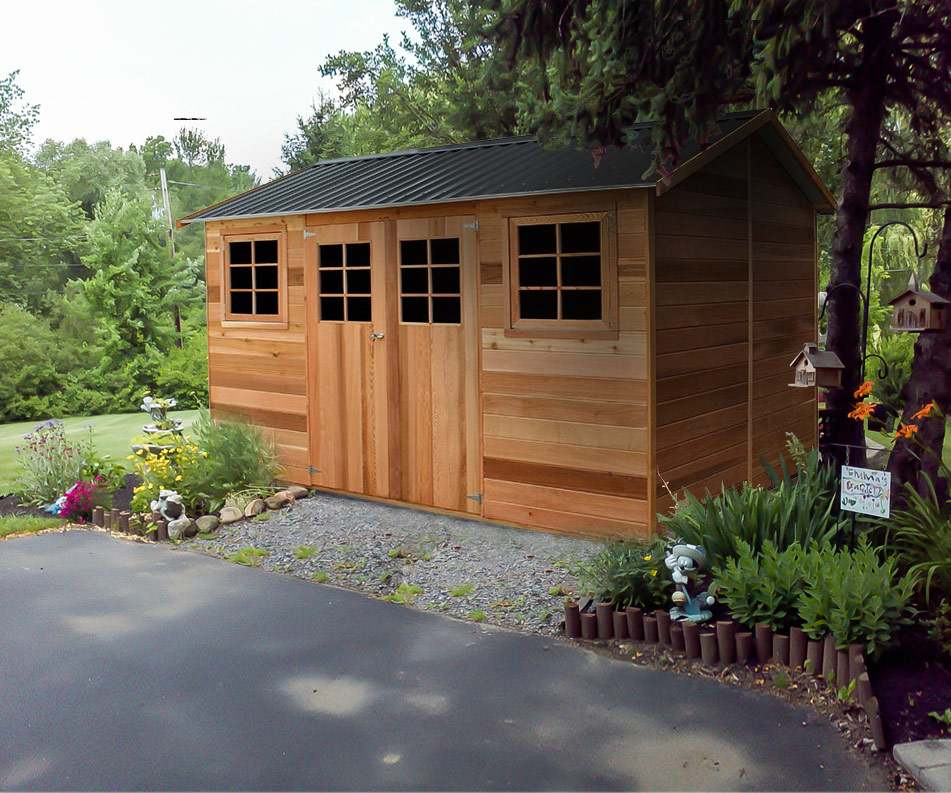
Will termites eat my Cedar shed?

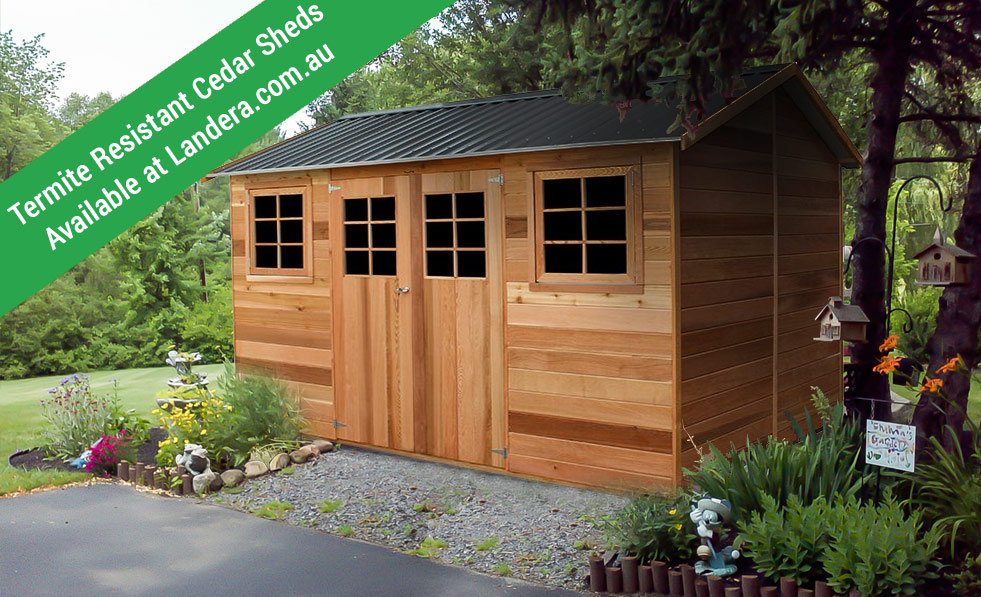
Western Red Cedar has an in-built resistance to termites because of a naturally occurring preservative in the wood. Scientists have shown that Cedar was not only repelling termites but was also toxic to the termites who did try consuming it. Because of this, Cedar is a great type of wood to use on garden sheds. Termites will look for alternative sources of wood first, leaving the ‘non-preferred’ Cedar alone. Cedar sheds termite resistance means you can be confidant your shed will be around for many years to come.

And it only gets better….

An exciting feature of Western Red Cedar is its resistance to moisture absorption. A benefit from this is high decay resistance and natural water resistance. This ensures that your shed doesn’t suffer warping or twisting the same as other timbers may do.

And of course, it has good insulation value and smells great, too. It performs far better than steel or other softwood timber. This is good to know if you are going to be spending a fair amount of time in your shed/hobby room/get away!

More and more people in Australia are opting to purchase Cedar wooden sheds. And I can see why.

Beautiful warm wood grains ranging from a light straw colour through to a darker red gives a natural and rustic charm that other man-made materials can’t quite seem to match.

Landera offers a range of Cedar garden sheds that are manufactured right here in Australia. These Cedar sheds are made from Western Red Cedar that is from sustainable forests in British Coloumbia.
We have small Cedar timber sheds for those narrow spots, going right up to spacious sheds that are popular as hobby homes and retreats.cedar-shed-range

Click the image to view our range of Cedar Garden Sheds.


Popular best greenhouse buy available at special pricing.

greenhouse_best_buy

The popular SILVER LINE 6 x 8 greenhouse

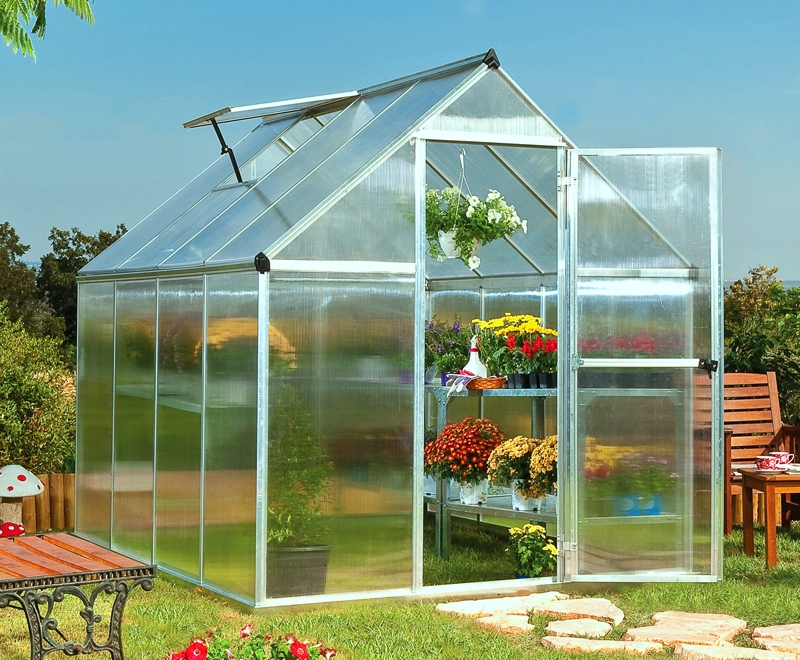
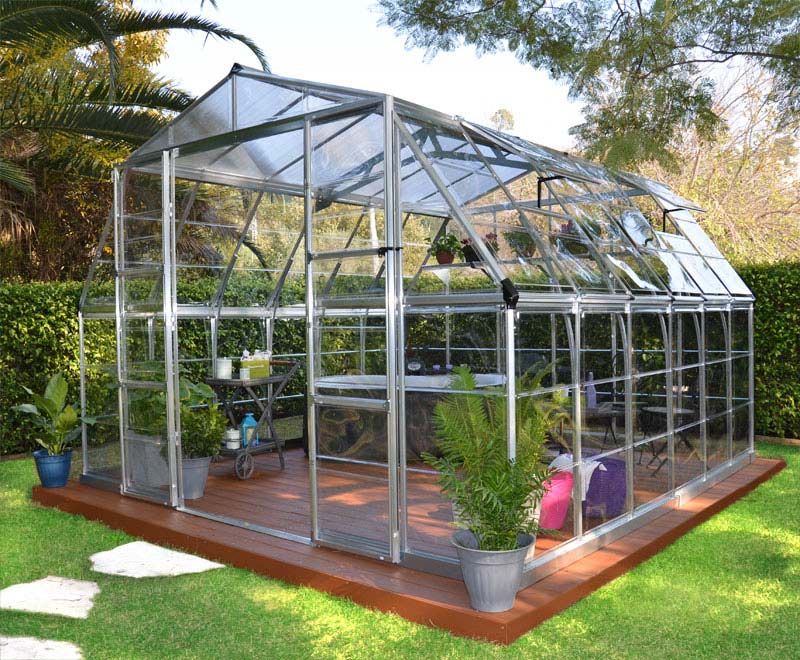
The best greenhouse buy is available from Landera again – the SILVER LINE 6 x 8 was a sell out last season, simply because it represents excellent value for money. The robust extruded aluminium frame system is strong and easy to assemble and the polycarbonate glazing is virtually unbreakable. The assembly instructions provided with the SILVER LINE 6 x 8 are very comprehensive and in an easy to follow diagram form.

The SILVER LINE 6 x 8 greenhouse is 1850mm wide and 2480mm from front to back, making it large enough to fit in shelves and benching easily but not so big that it takes up too much room in the average backyard. The ridge height of 2090mm ensures plenty of headroom, allowing for freedom of movement and also the opportunity to hang baskets and pots; (specially designed Plant Hangers are available to make this easy). The greenhouse is supplied in kit form and the clear and comprehensive assembly instructions make installation simple.

A range of optional accessories including shelving, benches and additional venting is also available to suit the SILVER LINE 6 x 8.

And the good news is that this greenhouse best buy is available at a special price  – $659.00 delivered (saving you $102.00 on normal price), while stocks of the current shipment last.


landera-balcony-gardens-oct1

Even if your balcony is only the size of your walk-in robe, don’t despair!  Here are some helpful hints to achieving a dream balcony garden

1. Make your balcony garden an extension of your indoor space   A balcony garden has the greatest impact when it is an extension of your indoor space. Think of it as a place to sit and enjoy some time in the sun with a coffee and watch the world go by.  Smaller spaces will require you to think efficiently and creatively.  Check our storage and seating category for some great ideas.

2. Consider the aspect of your balcony   A balcony, particularly on high-rise buildings, will be affected by wind.  If you have a sea view, the wind will be salty.  These factors can mean damage to both pots and plants.  Be realistic about how exposed and windy your balcony is and plant in heavy pots or use vertical gardens, and prepare for those freak storms.  Plant low, mound forming plants and mass several together to create a lush look.  You will need to water the plants regularly to make up for the drying wind.

For east and south facing balcony gardens, or balconies that are heavily shaded by the floor above, go for shade plants like hydrangeas and camellias.  For a west facing balcony garden, choose heat and sun tolerant plants, as this aspect cops the scorching afternoon sun in summer.  The dwarf bougainvillea or succulents are ideal.  For north and north-east aspects your balcony garden will be sun-drenched for most of the day and, if it’s sheltered from the wind, herbs and vegetables and flowering annuals will thrive!

landera

3. Start with a small base of evergreens   This will give you a garden all year round, then add seasonal plants for variety.  Gardening requires maintenance and a balcony garden is no different.  Choose plants that require minimal upkeep to start with, then get creative!

4. Design with colour   Use no more than three colours, with green as a given.  Make the garden interesting by growing plants in different tones or textures of the colours you choose.  Don’t upstage your garden with the pots; by keeping them all the same colour, the base view will be calm.

5. Check what load your balcony will bear    It’s always wise to have a structural engineer check what weight your balcony can support.  Aesthetically, the bigger proportions of bigger pots look better, and as they hold more soil plants are less stressed giving them better chance of healthy growth, but they become very heavy when filled with wet soil.  Keep heavy items around the perimeter of your garden balcony, as the weakest point will be in the middle.

Take a leaf from Australia’s best known eco-garden designer Joost Bakker and create a low-water style of vertical balcony garden.  There are lots of vertical garden systems around these days, and with a little careful planning  you can create amazing space which will definitely impress your visitors.  The City of Sydney ‘Green Villages’ program has a great inspirational guide to creating a balcony garden.


Winter time is a great time for planning outdoor areas

Time spent in the garden during the winter months tends to be strictly maintenance-only mode – it is a bit difficult to get enthusiastic when your fingers and toes are numb. But you can easily find an hour or two during the winter months to do some forward thinking. Planning outdoor areas, whether for new garden layouts or for changes and upgrades to your outdoor entertaining spaces, is a most enjoyable activity.

If you are thinking of a covered outdoor entertaining area, the new Palram PALERMO gazebos are well worth considering. Available in DIY kit form, they are not only strong, being made from heavy gauge aluminium extrusion framing with unbreakable polycarbonate glazing, but they are very attractive and require minimal maintenance.

PALERMO 3000 Gazebo

PALERMO 3000 Gazebo

Planning outdoor areas to make the most of possibilities of your situation actually does take quite a bit of careful thought. Many factors have to be taken into consideration, including privacy and prevailing weather as well as local government requirements and, of course, your budget.


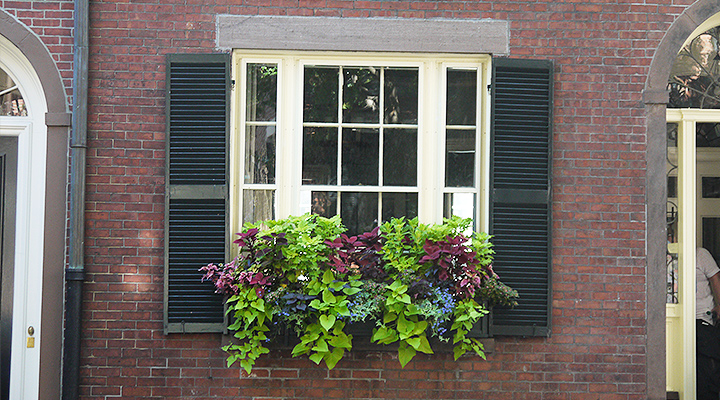
Window boxes are an interesting feature in Boston’s most famous street

window-box-acorn-street

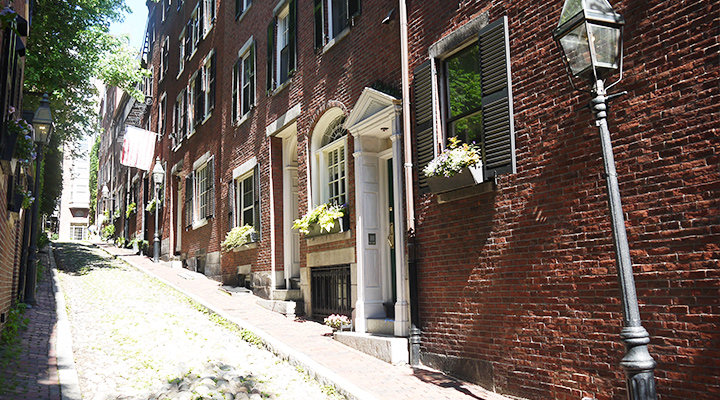
Window boxes are the front gardens of Boston’s most photographed street!

One of the staff members from Landera recently visited the US and spent an interesting day exploring Beacon Hill in Boston, Massachusetts. This area is one of Boston’s oldest communities and retains many of the features of a bye gone era – narrow streets of conjoined brick houses with decorative ironwork, beautiful stone doorway frames, narrow streets and gas lamps.

Acorn Street is one of these narrow streets. Paved with cobblestones, it is just wide enough for a car to drive through – although not many do. Most visitors enjoy the walk through an environment that has hardly changed since the early 1800’s. And they can’t help noticing the window boxes and planters; the fact that doors open straight onto the footpath is obviously not considered a good reason for not having a front garden!

Actually, plants such as flowers and herbs can be grown almost anywhere – window boxes, planter pots and vertical gardens all offer great scope for the imaginative gardener.

acorn-street-boston

Acorn Street, Beacon Hill in Boston – cobblestones, gas lamps and window boxes


A new plastic garden shed from KETER provides storage where space is at a premium.

keter-pent-6x4

KETER PENT 6 x 4 Plastic Garden Shed

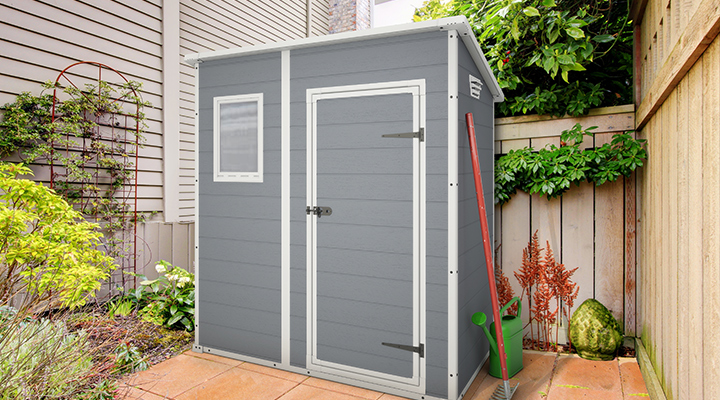
A new plastic garden shed, the KETER PENT 6 x 4, is specifically designed to meet the need for economical compact outdoor storage in situations where space is at a premium. With a floor area of almost 2.0 square metres and a maximum internal height of just under 2.0 metres, it can cope with a surprising amount – brooms, mops and buckets, gardening tools such as rakes and yard brooms as well as toys, bikes and sporting equipment.

The panels are a strong double wall construction manufactured from UV-stabilised polyethylene resin plastic formulated for outdoor applications, and as with all KETER plastic garden sheds, the floor is an integral structural component. This allows you to install the shed on any firm, level site and saves the expense of a concrete slab or timber floor – a factor which deserves consideration, as the cost of a concrete or timber base can run into some $100’s.

Ongoing maintenance is minimal with good quality plastic garden sheds – they will not fade, scratch or dent as steel Color and Zinc sheds are prone to do, (especially low-cost units which are made from very light gauge materials). An occasional wash down with the hose will keep the PENT 6 x 4 looking like new.

If you would like to find out more about the complete plastic shed range, including units from Palram and Lifetime, CLICK HERE.


Keter’s new NOVEL outdoor storage box is a modern classic

keter-novel-outdoor-storage-box

KETER NOVEL OUTDOOR STORAGE BOX

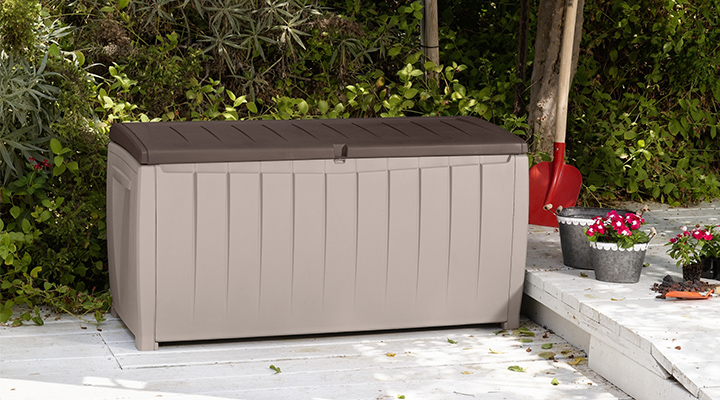
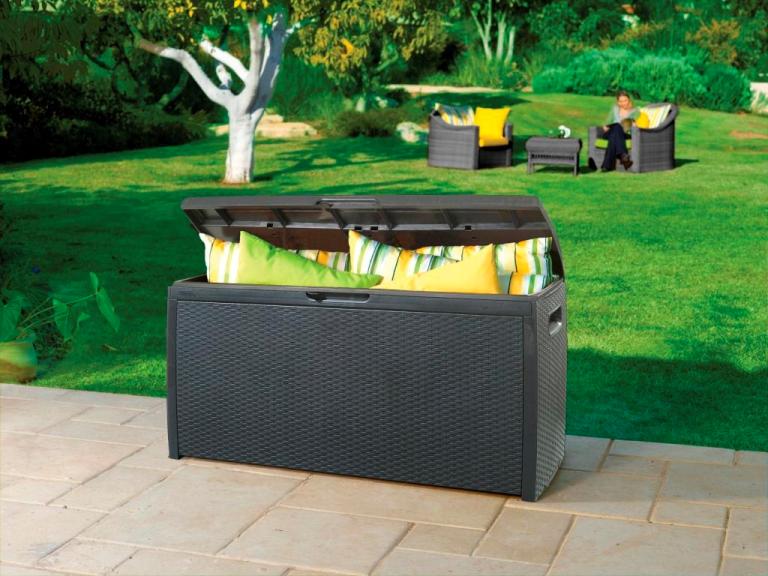
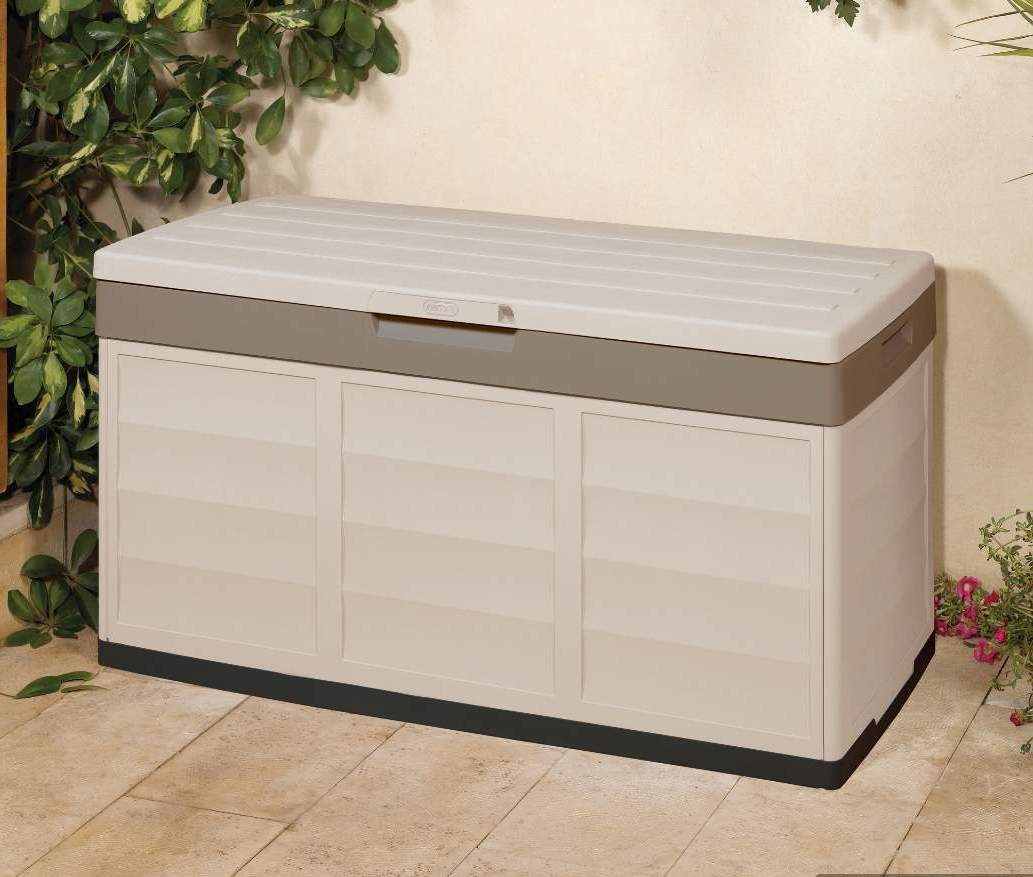
The new outdoor storage box released by Keter – the NOVEL – is an attractively designed unit which offers 320 litres of weatherproof protection space for household items such as outdoor bench and deck chair cushions, hand tools, toys and sports equipment. And not only will the NOVEL outdoor storage box keep the contents dry and ventilated, it also doubles as an outdoor seat for 2 adults with a loading capacity of 220kg.

Manufactured from injection-moulded polypropylene resin components, the NOVEL outdoor storage box is able to withstand the harsh Australian climate as the plastic used is a UV-stabilised formulation. It is supplied as an easy to assemble kit and no tools are required – components simply click together.

The NOVEL is a great way to tidy up your outdoor area and protect your gear. In fact, many people are now using outdoor storage box and cabinet units to free up storage space inside the home; safe, lockable and weatherproof storage solutions are a valuable addition to any home. Keter makes a great range of outdoor storage products, including deck boxes, cabinets and plastic garden sheds. Landera also offers free delivery within Australia on the Keter range as well as many other outdoor and home products that we offer, including storage cabinets designed for inside use, a great range greenhouses, gazebos and garden accessories.


Plastic outdoor playground storage boxes and cabinets keep areas tidy and safe

outdoor_storage_cabinet

Keeping the play space safe is a priority at kindergartens and preschools

Safe playground storage for toys and equipment is always a priority at kindergartens and preschools. The range of options available is quite large; manufacturers such as Keter and Suncast specialise in plastic outdoor storage solutions such as boxes, benches and cabinets and these have significant advantages in a playground environment.

Firstly, they are robust enough to handle the treatment that even the most energetic youngsters can hand out as well as being made from a UV-stabilised polyethylene resin which resists the onslaughts of Australian weather conditions.

Secondly, the units are relatively lightweight. This is important because it ensure that lids and doors are not so likely to cause injuries to small hands which get in the wrong place at the wrong moment! Obviously, care has to be taken to prevent mishaps, but there is a significant difference in the potential for injury between a wooden or metal door and a plastic one.

The KETER STORE-IT-OUT MIDI has proved popular in playground storage applications – simple to assemble and excellent value at $299.00 including free delivery from Landera. This storage cabinet has the added advantage of gas strut supports to assist opening of the lid – this feature also prevents the lid closing rapidly, a plus for safety.

keter-store-it-out-midi

KETER STORE-IT-OUT MIDI OUTDOOR STORAGE CABINET


Greenhouses protect your plants and extend the growing season

inside-mythos

Greenhouses protect seedlings and increase growing rates


Greenhouses seem to be near the top of every gardener’s wish list this time of year! Protecting young and delicate plants from the cold winter wind and rain is a priority. As well as simply protecting plants, however, greenhouses are very effective in extending the growing season, resulting in longer productive life and better yields for your flowers and vegetables.

We published an interesting post a little while ago which described the actual results obtained by a customer in South Australia. This included photos of the vegetables grown inside compared with similar ones grown outside – and it is very convincing evidence of the effectiveness of greenhouses. They are also great for propagating seedlings; ensuring you get your plants off to a good start for the new season.

Greenhouses range in size from the very small mini greenhouse units such as the SILVER LINE cold frames through to quite large walk-in units such as the SILVER LINE 8 x 12. The SILVER LINE products feature strong extruded aluminium frame sections and polycarbonate plastic glazing which is virtually unbreakable. They are designed for strength and ease of assembly and have proved very popular with garden enthusiasts all around Australia. Currently one of the best offers available is the MYTHOS 6 x 8 which is an ideal size for the average back yard space and is a bargain at $599.00 including delivery!


greenhouse-mythos-6x8

SILVER LINE MYTHOS 6 x 8 GREENHOUSE


Saving space inside the home is one reason people are considering outdoor storage options.

outdoor-storage-options

KETER Factor 6 x 3


Looking to reduce clutter inside the house or tidy up the yard? The outdoor storage options available these days range from small weatherproof cabinets through to tools sheds which are quite large garden sheds. With space inside the home at a premium it simply makes sense to move what you can outside – ideally into secure, weatherproof storage that looks attractive and is maintenance-free.

There are a number of manufacturers who specialise in storage units designed for outside use, including KETER, LIFETIME and SUNCAST. Typically these products are made from UV-stabilised plastic, either polyethylene (HDPE) or injection-moulded polypropylene; materials which resist denting and chipping and which will not rust or rot.

If you are considering outdoor storage options, Landera offers a good range of types and sizes. Some of the most popular are the KETER COMPACT SHED and the FACTOR range of garden sheds. (The FACTOR range is even more attractive at present because of the bonus offer on KETER plastic sheds that is available until 30th June 2014)!

One very useful feature of the SUNCAST, LIFETIME and KETER products is that their construction includes the floor as a structural component. This makes installation quick and easy, as there is no need for a concrete slab or timber base – all you need is a firm, level site.  To find out more about, follow the link: outdoor storage options.  With Landera,delivery of the outdoor storage units is FREE not only in Sydney, Melbourne and other major centres but also to most places within Australia.


The new KETER STORE-IT-OUT MIDI has your gear covered!

store-it-out-midi-pool

The new KETER STORE-IT-OUT MIDI cabinet

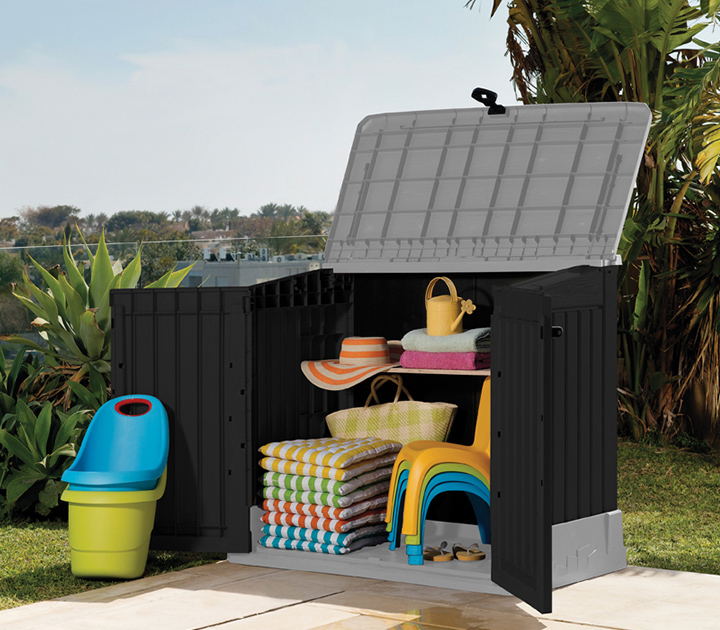
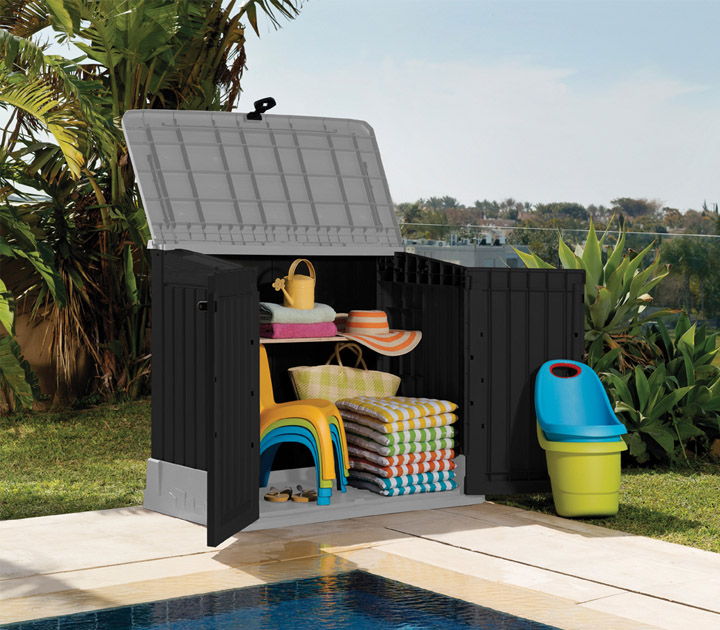
The KETER STORE-IT-OUT MIDI is a new outdoor storage unit ideally suited to poolside or courtyard situations. Its internal storage dimensions are 1210mm wide x 640mm deep x 1000mm high, providing capacity for protection and storage of a wide range of household items from pool equipment through to toys and garden tools.

It is manufactured from UV-stabilised polyethylene plastic, a tough material specially formulated to withstand the wear and tear of normal family usage as well as handling the extremes of the Australian climate.

The STORE-IT-OUT MIDI has a dark wood-look finish and easy access with its lockable wide-opening double doors and lid with gas strut supports. It also has provision for installing a wooden shelf if required. The unit is easy to assemble using ordinary household tools and does not need special base preparation as the floor is an integral part of the cabinet’s structure.

At only $299.00 including delivery within Australia, the STORE-IT-OUT MIDI is excellent value outside storage – and many people are using this type of unit to free up valuable storage space within the home. You can click here to order your outdoor storage cabinet.


Looking for a tool shed? Bonus deal makes FACTOR plastic garden sheds even more attractive.

tool-shed-factor-8x6

Keter FACTOR 8 x 6 tool shed

The new Keter FACTOR range of plastic garden sheds provide a good quality solution to your outdoor storage needs. Sizes range from the FACTOR 6 x 3 which is a compact 1780mm x 1135mm right through to the FACTOR 8 x 11 which is 2565mm across the front gable door panel and 3315mm from front to back. The FACTOR range shares the features that have made the Keter tool sheds so popular – easy to assemble, maintenance-free and attractive appearance are the benefits that thousands of satisfied customers appreciate.

Another major benefit of the Keter plastic tool sheds is the fact that their design incorporates an integral floor. This obviates the necessity for laying a concrete slab or constructing a timber base – all you need is a firm, level surface to install the Keter shed on. Assembly is straight-forward; very comprehensive, easy-to-understand instructions are provided and no special tools or trades knowledge are required. And if you need to move the tool shed, it can be disassembled just as easily and reconstructed at a new location.

The KETER range of plastic garden sheds is manufactured from a polypropylene resin specially formulated for long outdoor service life. It is UV-stabilised and impact resistant, enabling it to handle the wear and tear of the climate as well as ordinary household usage.

To make the FACTOR range even more attractive, Landera is offering as a bonus a FREE RATTAN STYLE STORAGE BOX in ESPRESSO BROWN with every FACTOR plastic shed ordered before 30th June 2014! This outdoor storage box, with a RRP of $159.00, is a sturdy, weatherproof unit with a storage capacity of 265 litres – just another excellent reason for solving your outdoor storage needs with a Keter FACTOR plastic tool shed! Click here to find out more about plastic garden sheds from Keter.

rattan storage box_open

Keter Rattan Style Storage Box


The new Willow 8 x 12 timber garden shed from Landera makes an excellent studio or workshop.

The popular Cedar Shed range from Landera has recently been augmented with the introduction of the WILLOW 8 x 12. This quality timber garden shed was developed as a result of numerous requests for a modified version of the MASTER SHED 8 x 12 featuring a double door set in the centre of the longer wall with an opening window either side.

This layout seems to be ideal for many people; it allows good access to the centre of the internal space and good light distribution for workshop or studio activities. And, of course, the standard options such as the REBATED FLOOR KIT and the HEAVY DUTY FLOOR KIT are available if required.

As with the other timber garden sheds in the range, the WILLOW 8 x 12 is designed for easy installation by the average handyman. The wall panels are pre-made to make the job easier; the actual assembly typically takes about 3 to 4 hours, although this does depend on the amount of site work needed to provide a suitable base for the shed.

The Western Red Cedar VJ panel cladding offers a really attractive appearance as well as excellent weathering qualities, ensuring that the WILLOW 8 x 12 will remain a handsome addition to your property for many years to come.


Popular greenhouse best buy available again – new shipment.

greenhouse-mythos-6x8

SILVER LINE MYTHOS 6 x 8 GREENHOUSE

The greenhouse best buy is available from Landera again – for delivery in early June! The SILVER LINE MYTHOS 6 x 8 was a sell out last season, simply because it represents excellent value for money. The robust extruded aluminium frame system is strong and easy to assemble and the Twinwall polycarbonate glazing provides good insulating qualities as well as being virtually unbreakable. The assembly instructions provided with the MYTHOS 6 x 8 are very comprehensive and in an easy to follow diagram form.

The MYTHOS 6 x 8 greenhouse is 1850mm wide and 2480mm from front to back, making it large enough to fit in shelves and benching easily but not so big that it takes up too much room in the average backyard. The ridge height of 2090mm ensures plenty of headroom, allowing for freedom of movement and also the opportunity to hang baskets and pots; (specially designed Plant Hangers are available to make this easy). The greenhouse is supplied in kit form and the clear and comprehensive assembly instructions make installation simple.

An important feature of the MYTHOS 6 x 8 is the Twinwall polycarbonate glazing panel – this is especially suited to inland situations where temperatures can drop below zero because it offers excellent thermal insulation. The Twinwall sheet is UV-stabilised and provides good light diffusion; in fact this type of glazing is widely used in commercial greenhouses internationally because of its balance of strength, insulating and light transmission abilities.

A range of optional accessories including shelving, benches and additional venting is also available to suit the SILVER LINE MYTHOS 6 x 8.

And the good news is that this greenhouse best buy is available at the same price as last year – $599.00 delivered, while stocks of the shipment last.


Is a greenhouse a cost-effective way to grow plants?


does a greenhouse help plants to grow?

Comparison between plants grown inside and outside a greenhouse

Does a greenhouse help plants grow?

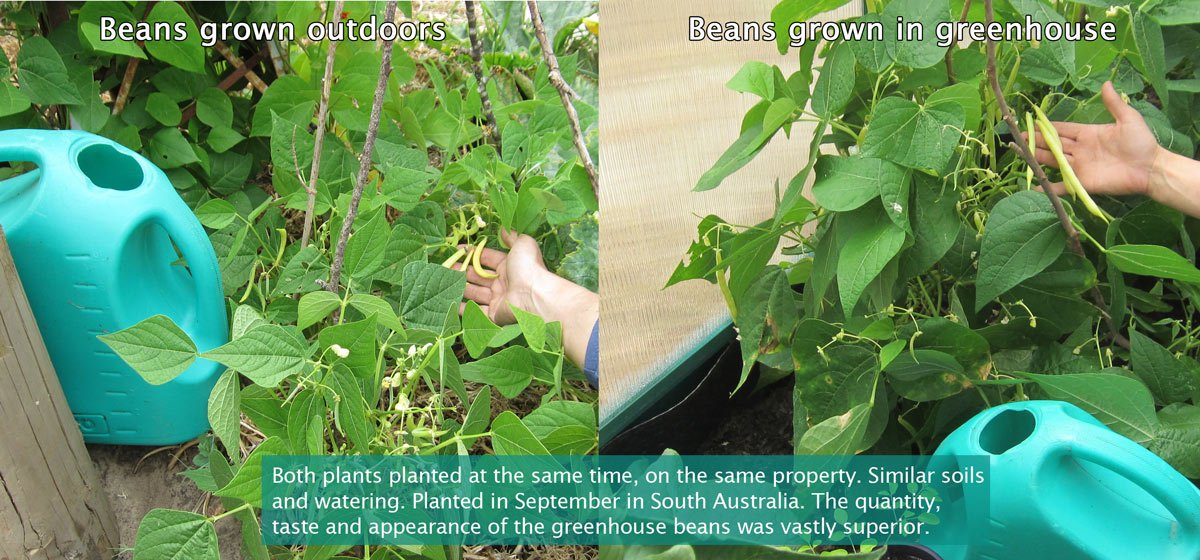
The question often comes up; just how effective are greenhouses? In other words, will the results you obtain in increased yields and quality justify the expense outlaid in buying and installing the greenhouse? Well, here we have a case study showing the actual results obtained by customer in South Australia who was so excited with the benefits of greenhouse gardening that he sent us this photographic evidence. (He even took the time to set it up nicely in Photoshop for us!).

The interesting thing about this information is that it provides a direct comparison between growing inside the greenhouse and identical plants planted at the same time and grown outside the greenhouse. In this case, the plants being grown were beans. And as you can see, there is a huge difference in the actual size of the beans produced. (Click on the image to enlarge it). The customer also reports that those grown inside the greenhouse were noticeably superior in taste – a convincing answer to the question, does a greenhouse help plants grow?

Another interesting feature in this comparison is that the customer is in rural South Australia not far from the coast. The beans were planted in September, the time of year not normally associated with extremes of heat or cold in that part of Australia. Nevertheless, there was a startling difference in the quality and size of the beans produced.

This is a great recommendation for using a greenhouse for growing vegetables; not only beans of course. The same customer reports similar excellent results with the tomatoes he has planted. It is well worth checking out the great range of greenhouses at http://www.landera.com.au/green-houses-polycarbonate. These vary in size from small units are suitable for courtyards and balconies right through to units suitable for small commercial growing operations.


New Keter XL PRO cabinet offers neat storage for laundry and garage situations

Finding suitable storage for laundry and garage situations can be a real challenge – and the new XL PRO cabinet from Keter offers an excellent solution. Specifically designed for use inside the home, the XL PRO provides secure and strong storage as well as neat and stylish appearance. The cabinet is manufactured from injection-moulded polypropylene plastic and is quite tough enough to handle the rough and tumble of family life and still retain its good looks.

storage-for-laundry-and-garage

KETER XL PRO Indoor Storage Cabinet

The XL PRO features lockable doors with metal hinges and handles; security is a real concern when you are storing pesticides, weed-killers and other poisonous products, especially when there are small children around. The adjustable shelves are reinforced and can safely carry loads of up to 45kg each, while the bottom shelf can carry up to 70kg! And because it is made from polypropylene, it is not affected by damp conditions – it won’t rust, fade, peel or dent as painted steel cabinets are prone to do.
Find out more about the KETER XL PRO Indoor Cabinet – it might be just what you are looking for!


Plastic garden sheds are becoming more popular and widely used in Australia

Nearly every residence in Australia, from farming properties right through to apartments and units, has a need for some form of outdoor storage, such as garden sheds or cabinets. Some items like lawn mowers and garden implements are simply not the sort of thing we want inside; others such as cans of fuel have to be stored away from the house to meet the requirements of insurance policies.

This type of storage is often a garden shed, although other options including outdoor storage benches and cabinets are becoming more widely used.

Traditionally, the backyard shed was framed up with whatever timber was available and clad with corrugated iron sheet. During the 1970’s new ranges of garden sheds became available through garden centres and hardware stores. Some of these are supplied as pre-assembled panels made from galvanised, Zincalume or Colorbond steel sheet, and some as kit form cartonised units made from coated steel or aluminium. Aluminium is not used today for garden sheds, as it is relatively expensive and not as strong in sheet form. 

During the past 10 years or so, plastic garden sheds have been gaining acceptance as an alternative to the metal units. Mostly these are manufactured from polypropylene resin which gives a good balance between strength, weathering (including UV resistance) and cost. Some manufacturers have just started using polycarbonate for garden sheds – the high impact resistance of this product makes them virtually indestructible.

As with most questions, there are pros and cons for both types of shed – some of these are as follows:

METAL GARDEN SHEDS

PROS

  • Price – steel sheds are available at lower costs than plastic sheds; typically about half the cost per square metre of floor area
  • Wide range of sizes and colours – units from 1.5m x 0.78m up to 6.0m x 3.0m are available in Zincalume and in many of the standard Colorbond colours
  • Readily available – many sizes can be purchased from stock at hardware stores

CONS

  • Quality – there is a wide variation in the quality of units available; a good rule of thumb is the old saying: “You get what you pay for”
  • Base preparation – generally the metal garden shed kit does not include a floor; this necessitates base preparation which could include either constructing a timber floor or laying a concrete slab for the unit
  • Susceptibility to damage – steel sheds are relatively easy to scratch and dent, particularly the cheaper units which are made from very light gauge sheet and problems are often encountered with sliding doors jamming because of light construction


PLASTIC GARDEN SHEDS

PROS

  • Long-lasting – the plastic used for garden sheds has good impact resistance and UV stability, allowing the units to retain a good appearance for extended periods and offering long product life
  • Includes floor – the floor section is an integral part of the shed structure, providing a weatherproof storage space and obviating the need for a separate base or extensive base preparation
  • Good looking – the moulded section construction allows for a different and attractive appearance
  • Ease of assembly – comprehensive instructions and good product design make the assembly process straightforward

CONS

  • Cost – poly resin sheds are more expensive than steel units; typically more than twice as much for a similar floor area
  • Limited range of sizes– only sizes up to 9 square metres floor area are available currently


Conclusion?  It depends on your priority – if cost is the deciding factor a steel shed is the answer and if appearance and product life is more important to you – a poly resin or polycarbonate plastic unit is the logical choice.


But drinking water instead of other things can be a challenge

We all know that drinking water is essential for our well-being, but many of us prefer to drink it mixed with other things such as coffee, tea or soft drinks (which are often loaded with sugar) simply because we think they taste better. Given that the recommended intake is between 1.5 and 1.8 litres of water per day it isn’t surprising that we are interested in how it tastes. Of course, the amount we need depends on a number of factors including how much exercise we are doing and how hot and dry the weather is. Also, we often need to drink more if we are sick – perhaps with the flu, for example. In addition we do get a certain amount of water in our food, particularly vegetables and fruit such as lettuce and watermelon. And keep in mind that certain medical conditions such as kidney and heart problems do require careful monitoring of fluid intake under medical supervision.

Drinking the water we need in beverages such as coffee and tea isn’t necessarily a bad thing if we do it in moderation, but the fact is that drinking water by itself has advantages. Firstly tap water costs very little, particularly compared to soft drinks and secondly, it doesn’t contain any sugar, which of course is a real plus if working with a weight-loss program. Drinking sufficient water every day is a fundamental element of most exercise and weight management regimes.

If all we are used to drinking is tap water, we may not realise just how refreshing pure water can be. Municipal supplies are generally safe to drink, but the potential for pathogens such as bacteria and viruses breeding in the water necessitates its treatment with chlorine. This treatment is very effective, but it does affect the taste and smell of the water. Also, it is supplied through an extensive network of pipes and sediment particles such as rust flakes, grit and fibres are often delivered along with the water!

filtered water drinks

Filtered water makes great-tasting fruit drinks!

The good news is that easy to use and highly effective water filter systems are readily available and are not expensive to purchase and maintain. For example, a Filtaflo Counter Top CNB1 filter kit costs only $89.00 and maintenance would typically consist of replacing the Carbon Block cartridge (cost $39.95) every 6 months. This equates to an ongoing cost of less than $0.22 per day – much less expensive than bottled water – for water which tastes like it really should; clean and refreshing. Another great plus is that using filtered water will make your tea and coffee taste way better too – and you may like to experiment with some other drinks such as fruit cocktails, all in the interests of making your daily water intake more enjoyable!


Covering an untidy fence or wall a problem?

Covering an untidy fence is a problem that confronts many home owners from time to time. It isn’t always practicable to replace that fence or render and paint that wall. And it takes too long for that grape vine to grow large enough to do the job …

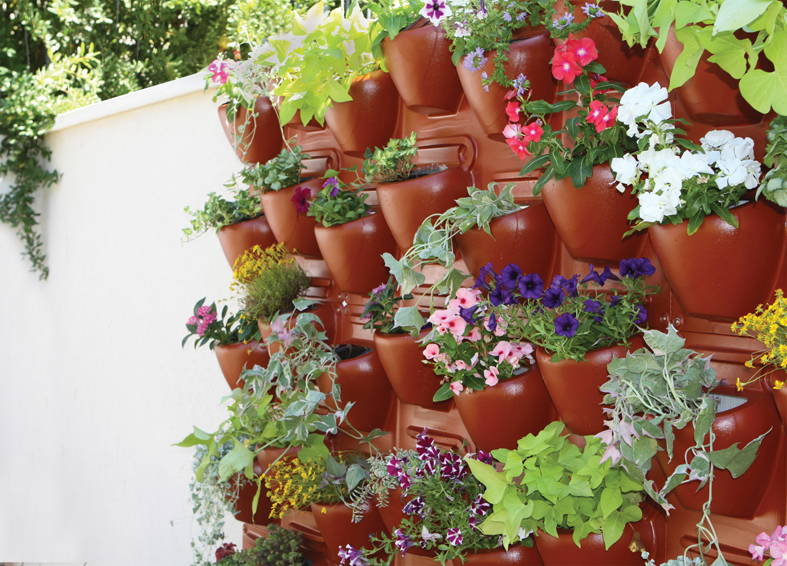
The PlantScape range of vertical garden panels are an ideal solution – inexpensive and easy to install, they are also low-maintenance thanks to their built-in dripper irrigation system. Each kit consists of two panels with four separate potting cells, allowing you to select a range of plants which complement each other and bring colour and a living ambience to your problem area!


Plantscape TERRA

PlantScape TERRA Vertical Garden panels

There are four styles of PlantScape vertical garden panels available – TERRA, LOG, STONE and HEX – allowing you to choose a design appropriate to your situation. More information about the units can be found at http://www.landera.com.au/vertical-gardens . Each panel design allows matching both vertically and horizontally, so multiple units can be used to cover any area. The in-built irrigation drippers make watering your plants simple and water usage is kept to a minimum.

Having a wall of green, living plants to look at is a vast improvement on worrying about an unsightly fence!


Richmond 6 x 4 – the new timber garden shed from Landera

timber-garden-shed-richmond-6x4

The new Richmond 6 x 4 from Landera

The range of timber garden sheds available at Landera has expanded with the introduction of the Richmond 6 x 4 from Landera. This unit is specifically designed to provide for smaller spaces in courtyards and situations where storage opportunities are at a premium.

The Cedar Shed range of timber garden sheds is manufactured in Australia, constructed from imported Canadian western red cedar VJ cladding with 42 x 42mm termite resistant pine framing. The roof cladding is roll formed high tensile Colorbond steel sheet.

An outstanding feature of the Landera range, which the Richmond 6 x 4 shares, is that they are supplied as easy to assemble pre-made panels. This makes assembly and installation a breeze – typically the Richmond 6 x 4 would take approximately 2 hours to construct. Cedar Sheds can be installed on a pre-laid concrete base or on either a rebated floor or the heavy duty floor kit options available. The heavy duty floor kit is particularly useful on sloping sites as it makes installation simple and minimises the need for excavations.

The Richmond 6 x 4 is an attractive addition to any yard; the colonial style door with tinted acrylic glazing and locking to handle as well as the gable roof with overhanging eaves are standard features. Optional extras which are readily available include a double opening door for increased access, and opening window kit with tinted acrylic glazing and a loft shelf unit to maximise internal storage opportunities.

Our experience with the timber garden shed product range has been very positive. Customer feedback regarding product quality has been excellent and the company has demonstrated a real commitment to meeting manufacturing and delivery deadlines. We have no hesitation in recommending these products – as an outdoor storage solution they are well worth considering as an option to the commonly used metal garden shed. Their 10-year factory backed warranty and the proven longevity of western red cedar in outdoor cladding situations, as well as their good looks and overall strength, make a compelling case.

This could be the answer to your storage needs you have been looking for! 


Town water is safe, so why filter your tap water?

People often ask; why should you filter your tap water? After all, the local water board goes to great pains to ensure that the water coming from your tap is safe to drink. And it is true that generally speaking here in Australia we are very fortunate to have plentiful supplies of high-quality water at our fingertips.

But just because the water is safe to drink doesn’t mean that it is pure. For a start, the way that water is made biologically safe in municipal systems is by the addition of chlorine. This is an excellent method of killing pathogens such as bacteria and viruses, but it doesn’t taste particularly nice in that freshly brewed coffee! Another factor which affects the purity of your drinking water is the fact that it is delivered to you through an extensive network of pipes, some of which can be very old. This results in sediment such as flakes of rust, small pieces of grit and fibres being present.

There is a vast range of water filters available to address these problems. Systems which filter the water for the whole house are sometimes used, but these tend to be expensive and the reality is that much of the water used in household operation does not need to be filtered. Point of use systems such as countertop or under bench kitchen units are much more common.

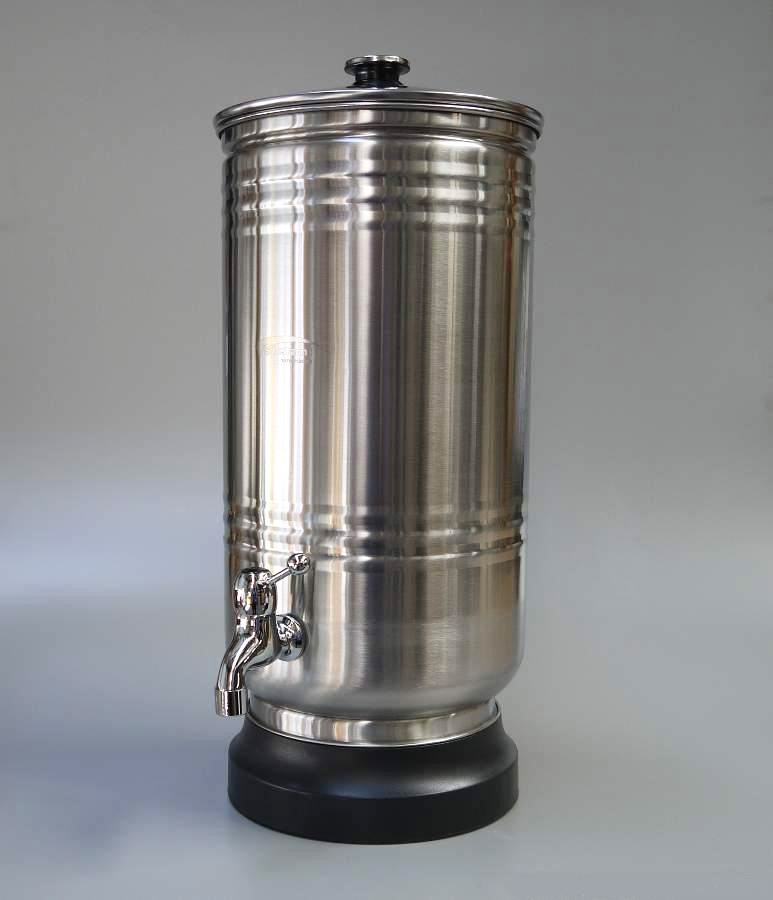
stefani-water-purifier

Stefani 8.0 Litre Water Purifier

One of the most economical and effective point of use water filter systems available is the Stefani 8 Litre Water Purifier. This attractively styled unit is made from high quality stainless steel and features a micro-porous ceramic filter cartridge. This cartridge is the heart of the unit and provides excellent quality drinking water. The external ceramic casing of the cartridge removes sediment to a level of 0.5 micron and is lined with colloidal silver to inhabit bacteria growth. The inside of the cartridge is filled with granular activated carbon which is an extremely effective medium for removing chlorine as well as organic contaminants such as tastes, odours and pesticides.

Maintaining the Stefani Water Purifier is simple; the ceramic cartridge can be removed periodically and any sediment buildup scraped off. The cartridge should be replaced every six months or so, as the activated carbon becomes exhausted and its ability to remove chlorine reduced. Replacement cartridges are readily available and are inexpensive.

Pure, fresh tasting water is a real treat! And with it so readily available the family will be drinking that instead of some of the less healthy alternatives!


There is a bit more to making compost than throwing your scraps in a bin

composting

Composting garden waste and kitchen scraps

Compost is basically decomposed organic substances such as garden waste and kitchen scraps. Any organic material will decompose in time. This is happening constantly in nature, and composting is really just a method of speeding up the natural processes of rotting. Using good techniques ensures relatively rapid production of compost with minimal loss of nutrients, and specially designed composters are available to make this easier.

Composting has been carried out in one form or another for at least 4000 years. The Chinese, for instance, have been returning practically every scrap of vegetable or animal residue to their farmland after composting, and their methods were studied in the early 1900s and documented in a book called “Farmers of Forty Centuries” written by an American soil scientist, Dr F. H. King. Another scientist, Sir Albert Howard, who was working in India in the early 1900s, conducted extensive experiments and developed the first properly documented systems for the optimum level of natural biodegradation with the maximum elimination of harmful bacteria. Howard’s work was conducted in the Indore region of India where the hygienic disposal of sewage was a major problem because of the dissemination of killer diseases by flies. This research work forms the basis of composting techniques which have been used in backyards for many years.

The essential ingredients for making compost are organic materials, microorganisms, moisture and oxygen. You will also need a little soil, gypsum or dolomite. The quality of the compost you make depends on the quality of the rubbish and waste materials used. The most important aspect of quality is the ratio of carbon to nitrogen (C/N ratio) of the materials used. Microorganisms need both carbon and nitrogen to make proteins. They use about 30 parts by weight of carbon for each part of nitrogen used, so materials used for composting need to have a C/N ratio of about 30. It has been found that an average C/N ratio in the range of 25 to 30 will work well.

As an indicator waste materials such as lawn clippings and weeds have any C/N ratio of around 20. Kitchen food wastes have a ratio of around 15, whereas materials such as leaves and pine needles have a ratio of around 65 and straw has a ratio of approximately 100. Keeping this in mind, it is clear that kitchen waste by itself will not make good compost easily – we need to mix it with other waste materials such as leaves or straw to achieve a suitable C/N ratio.

One of the main problems people encounter when they start their composting program is that it doesn’t seem to be decomposing properly – it is wet and smells awful. This is particularly the case when kitchen scraps are the main ingredient. The answer is to address the question of the C/N ratio by ensuring that sufficient other materials such as straw or garden clippings are added regularly. A dusting of dolomite, garden lime or wood ash can also help by reducing the acidity of the mix.


Outdoor storage solutions for those need somewhere to store mops and brooms … and buckets and …!

compact_shed-Optimized

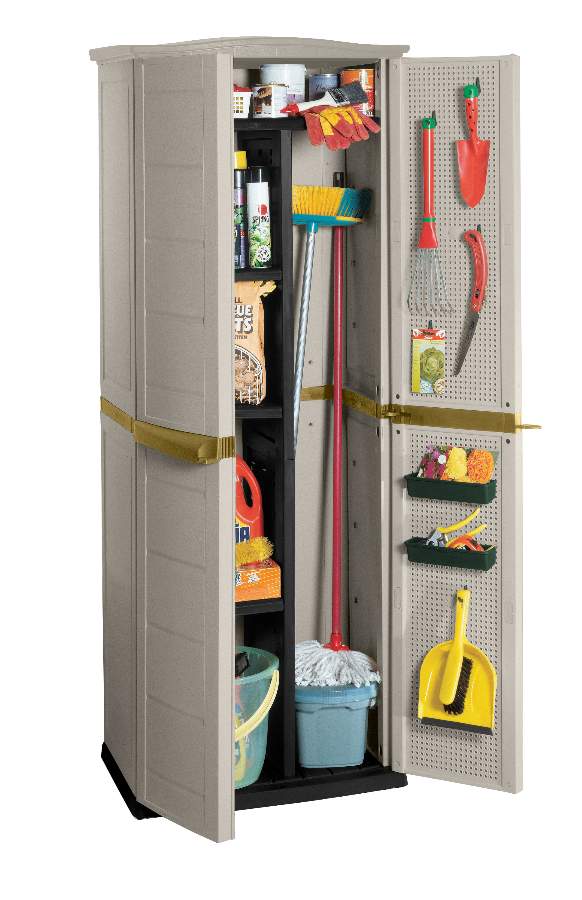
Keter COMPACT SHED WITH PEGBOARD

It’s just a fact of life – there is never enough room inside the house store everything that you need to. However, you often find that many household items can be stored safely and tidily outside in a secure weatherproof cabinet. So if you need somewhere to store mops and brooms, or for that matter, buckets, scrubbing brushes, detergent bottles etc, Landera can help you.

You can access a great range of weatherproof plastic outdoor storage cabinets and boxes available from manufacturers such as Keter and Suncast through Landera. These products are made from UV-stabilised polypropylene and are ideal for storing cleaning equipment and tools as well as toys and sporting equipment.

One of the most popular units is the Keter Compact Shed with Pegboard. This is an outdoor cabinet with a vertical dividing panel, allowing long handled brooms and mops to be stored on one side and other smaller items on the shelving adjacent. Other similar units are the Keter Rattan Utility Cabinet and the Suncast Vertical Tool Store. These units are easy to assemble and install, and are designed to keep the contents dry and secure.

Reclaiming valuable storage space inside the house is easy – check the product range at http://www.landera.com.au/outdoor-storage. Larger storage units such as plastic garden sheds are also available. These offer storage for garden items such as lawn mowers and wheel barrows as well as household equipment.


A greenhouse answers the question: How to stop animals eating your plants?

greenhouses protect plants

Possums – they look cute, but they can be a nuisance!

You probably know the feeling well. Your tomatoes or strawberries are nearly ready to pick – you have carefully watered and cared for them ever since you planted them, and now in just one or two more days you will be able to enjoy the incredible flavour of real fruit or vegetables grown in your own garden. So much better than the produce you buy at the supermarket which looks great, but tastes like plastic … You go out to check on the plants one last time, and something has beaten you to them!

This situation is common, even in inner-city suburbs in Sydney and Melbourne. Not only are starlings and blackbirds as well as native birds a pest, but also possums are becoming quite comfortable living in close proximity to people. In addition, some people find that even their own pets can cause a problem, especially if they are investigative by nature!

The good news is that there is a simple way to protect your plants from these predators. Greenhouses are primarily used, of course, to provide optimal climatic conditions for growing flowers, herbs and vegetables, but they are also ideal for keeping all those other interested parties at bay. The SILVER LINE range has units small enough for courtyards and patios ans well as ones suitable for gardens – see http://www.landera.com.au/green-houses-polycarbonate . The durable and robust aluminium framing and the virtually unbreakable polycarbonate glazing panels can defy even the most determined efforts of the furred and feathered marauders.

And of course, the benefits of growing vegetables and flowers in a greenhouse are a bonus – you can expect noticeably bigger and better results simply because of the controlled environment the greenhouse provides.


Growing in greenhouses – stress-free and healthy!

SP_Plant_Inn_Compact

Gardening at home is rapidly becoming one of the most popular pastimes in the world. It is a great way to relax and it is fascinating to watch your own flowers, vegetables, herbs and spices grow from week to week. Using the greenhouse helps you to extend the growing season as well as protecting your plants from the extremes of weather and the unwanted attention of pets and pests which seem to enjoy your plants at least as much as you do!

Greenhouse units are available for almost any size of yard or patio deck. Ranging from small cold frames right through to larger units suitable for professional growers, Landera has units which a robust and designed for easy assembly and quick installation. Whether you are a beginner or a seasoned greenhouse grower you will appreciate the robust aluminium framing and the virtually unbreakable polycarbonate glazing the Silver Line greenhouse units are constructed from. This range of greenhouse kits has many configurations including stand-alone, lean to and sun lounge models. Whatever model greenhouse you select to your situation it is important to provide a solid base for fastening it down, to ensure that it is not moved or shifted in strong winds.

You should also consider what shelving or bench space you require for working on and standing your plants. A range of greenhouse shelving and plant stands is available from Landera, and can be delivered with your greenhouse. Shelving is important because gardeners these days do not usually planted straight into the ground inside the greenhouse but use pots so that soil can be easily changed. This reduces the potential for damaging microorganisms to build up inside the greenhouse.

Another big positive for greenhouse growing is that there is an almost infinite amount of information and advice available to address practically any question or situation that arises. There is an immense bank of knowledge on the Internet – simply enter your question as a ‘search’ and you will be overwhelmed. There is also a large number of books on the subject of growing in greenhouses; a good selection can be found at http://www.bookdepository.co.uk/?a_aid=LanderaAustralia


Great composter design makes life easier!

compost-mixer-230-in-use

KETER Compost Mixer 230


The KETER Compost Mixer 230 is a new design concept which helps you to convert organic garden and household waste into compost for fertiliser quickly. The outstanding design feature is the geared turning handle which allows the drum in which the composting material is held to be turned effortlessly. 

The Compost Mixer is manufactured from injection moulded polypropylene which provides a rigid and strong structure. The locking latch prevents the door from opening while the drum is being rotated and the adjustable air vents provide access for the oxygen which is essential for effective decomposition. Aerobic composting (that is, composting in which oxygen is readily available) produces usable material for the garden in half the time taken when using a traditional compost heap.

Composting is becoming much more widely used as people realise the benefits associated with it. Not only does it save space in conventional waste disposal landfill facilities, but it also provides a nutritious supplement for the garden and reduces the need to use commercial fertilisers to build up soil quality in the garden. Many areas in Australia have very poor soil quality, making it difficult to grow and maintain plants other than local indigenous species. The addition of good quality compost not only provides nutrients for a wide range of plants but also assists with retention of water and reduces its usage.

The KETER Compost Mixer 230 is currently available on special at Landera, and we are offering free delivery Australia wide. Check this great product out at http://landera.com.au/composters/keter-compost-tumbler-230-litre.


Quality design and manufacture makes assembly of Cedar Shed range of timber garden sheds easy

cedarshed-master-lifestyle-Optimized

The Landera range of Western Red Cedar Garden sheds is manufactured in Australia.  This range offers a high quality alternative to the more commonly used zinc or colour garden sheds. Cedar Shed products offer size alternatives from 1.93 x 0.94 metres to 2.53 x 3.64 metres, and are supplied as easy to assemble pre-made panels. 

Installation of the Cedar garden shed products is a relatively simple process. The first step is to choose a nice level site in your yard. The floor position is marked out in a base constructed either using a recommended Stilla rebated floor or by laying a concrete slab. If the site is out of level, a good option to consider is the heavy duty floor kit. This has been specifically designed to reduce site works where the ground is not level.

Once the floor is in position the next step is to erect the pre-made walls. Starting at the front corner, the panels are joined and gables fastened into position. The roof is then assembled on the ground, lifted into position and fastened to the walls. Next the hinges are attached to the door, the door fastened to the wall and the door handle installed. Finally, the corner posts, cover strips, fascias and the ridge capping are attached to complete the product.

As well as the optional rebated floor kit and heavy duty floor kit (which includes a rebated floor), the Landera products can be modified to suit your situation by including double opening doors, opening windows, and handy loft shelves for maximising internal storage. Interestingly, Cedar Sheds, particularly the larger Glendale and Master Shed, are often used for workshops and garden studios as well as for storing household and garden items.

The Cedar Shed range includes the Birch 6 x 3, the Palmwood 6 x 6, the Oxford 6 x 9, the Glendale 8 x 8 and the Master Shed 8 x 12.  For more information, see http://www.landera.com.au/garden-sheds-timber .


Silver Line MYTHOS 6 x 8 greenhouses feature twin-wall glazing


greenhouse-mythos-6x8

SILVER LINE MYTHOS 6 x 8 GREENHOUSE

If you are interested in greenhouses for your garden, it would be well worth your while considering the new Silver Line Mythos 6 x 8 which is currently on sale at Landera. This greenhouse features the same robust and durable framing system as the standard Silver Line units, but is glazed with Twinwall polycarbonate sheet instead of the clear moulded panels. Twinwall polycarbonate glazing is particularly useful on greenhouses installed in highland areas and inland locations where temperatures can drop to sub-zero levels at night. The Twinwall structure of the polycarbonate glazing provides very good insulating properties and helps to stabilise temperatures inside the unit.

As with all the Silver Line greenhouses manufactured by Palram, the MYTHOS 6 x 8 is supplied in kit form with very comprehensive assembly instructions; (these are in diagram format – similar to the style IKEA uses – easy to follow in a logical step-by-step process). At Landera we have been supplying the Palram greenhouses for 2 years now, and have had excellent feedback – very few requests for assistance with assembly problems.

There is only a limited number of the MYTHOS units available at the current special price – $599.00 delivered within Australia while stocks last! Stock in warehouse June 2014.


Cedar wooden garden sheds prove popular

Wooden garden sheds

CEDARSHED OXFORD 6 x 9

The CEDARSHED range of Wooden garden sheds is proving popular with customers all over Australia. A great combination of good looks and robust construction. They offer an attractive alternative to the usual Zinc or Color steel shed. Although more expensive than the run of the mill metal garden shed, their superior appearance guarantees them serious consideration by discerning property owners.

One big advantage is the fact that different floor systems are available. Either a standard rebated timber floor suitable for installation on a firm, level surface or the heavy duty floor kit which includes foundation posts enabling it to be used on sloping sites. This can save a considerable amount of effort in site preparation.

The options of double opening doors and opening windows also enhance the viability of the CEDARSHEDS as an outdoor storage solution. With sizes ranging from the 1.9 x 0.9m BIRCH to the 3.6 x 2.5m MASTER SHED. The possibilities for practically any situation and garden storage requirement are extensive.

Find out more at http://landera.com.au/garden-sheds-timber.


Bonsai for balcony gardens – tips for maintenance and

enhancing appearance

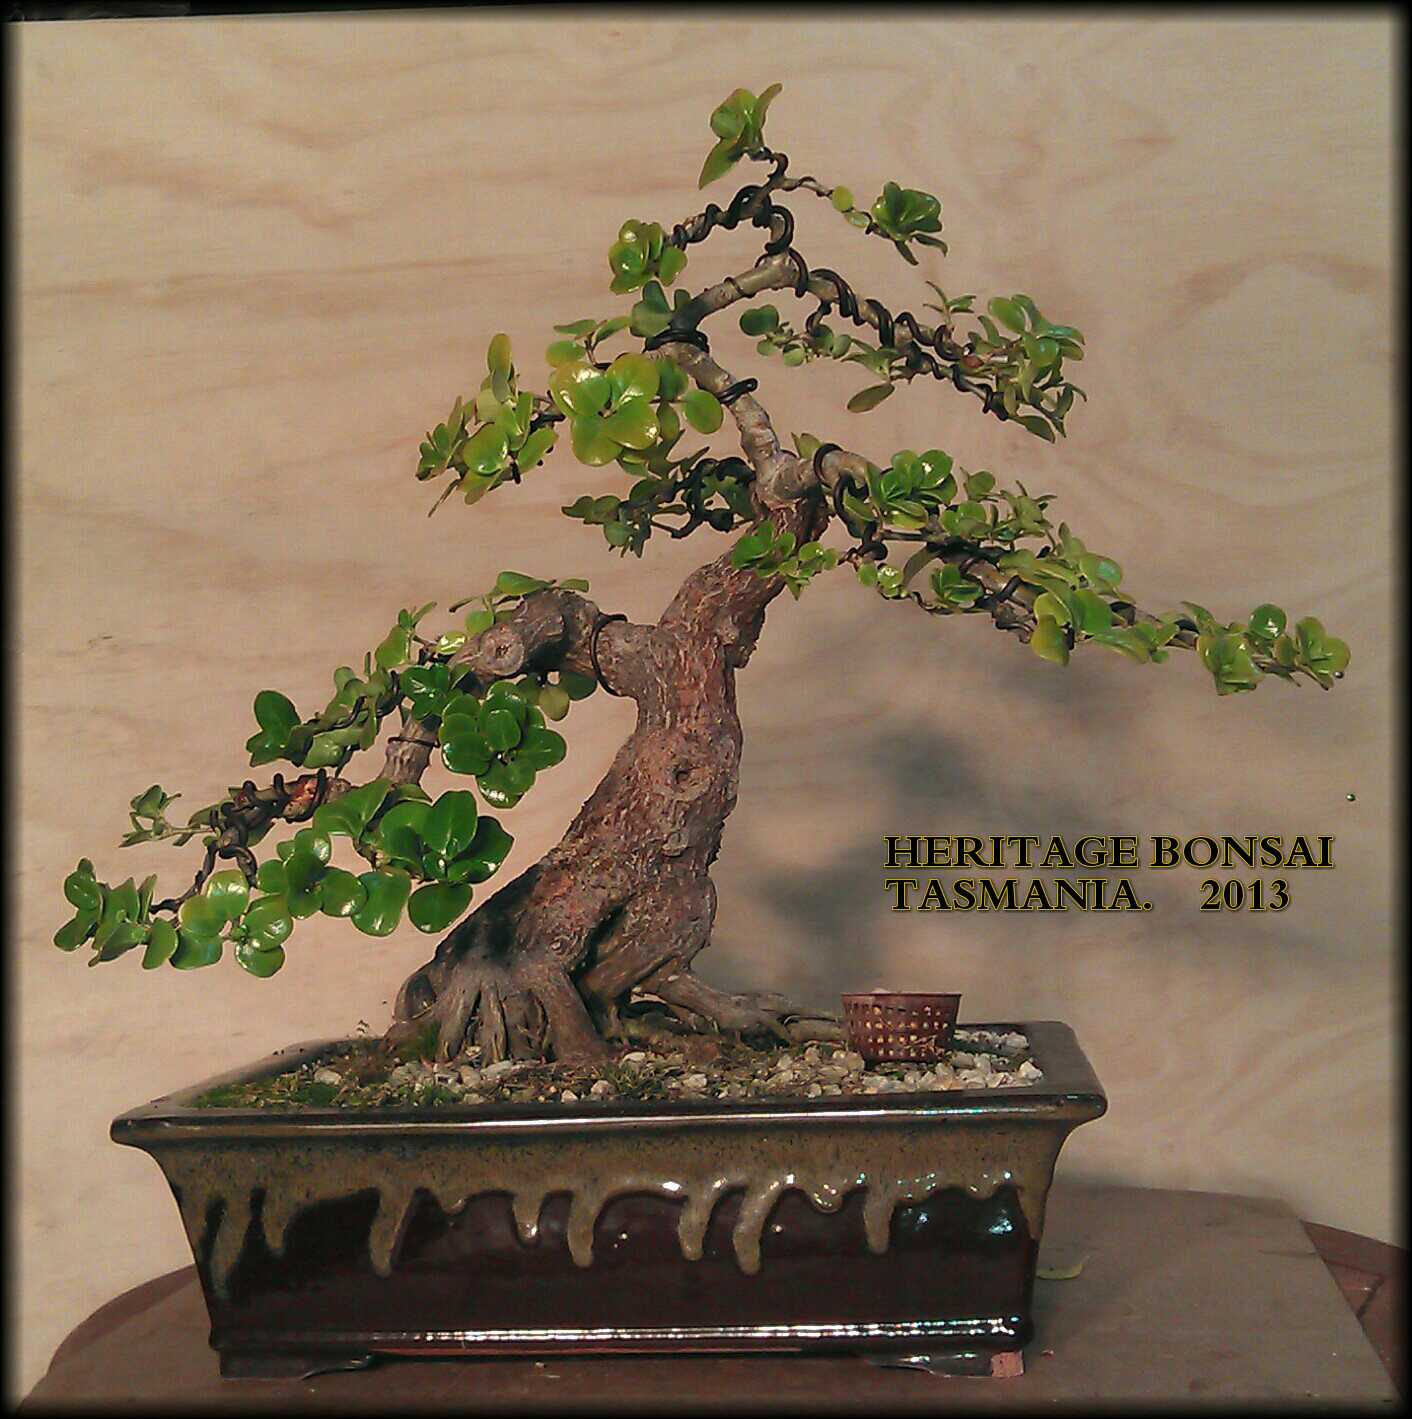
This is the last in the ‘Introduction to Bonsai’ series from Chris Xepapas at Heritage Bonsai. He refers to the importance of the root structure in bonsai – not only from a horticultural perspective, but also because the visible root structure is a vital aspect of the appearance of a good bonsai – with no visible roots it will look a bit like a totem pole rather than a miniature tree. The roots should be radially spaced around the trunk and those at the front should be particularly pleasing in appearance.

bonsai-heritage-root

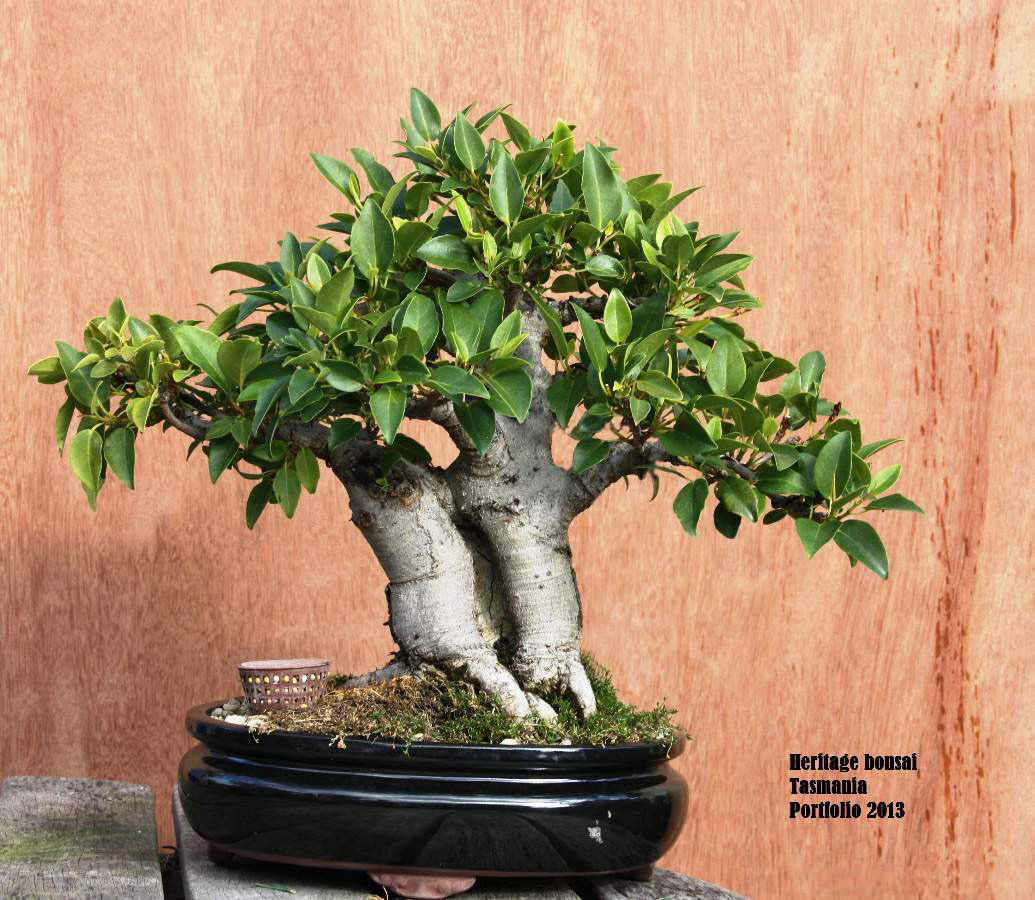
Established bonsai showing good surface root development

In this blog we will address the most over looked topic, root development. The key to a good bonsai is a healthy root system; it allows you to experiment with more daring techniques, while helping your tree cope with the stress. It is also important to have a good looking surface root structure to enhance the appearance of your bonsai. 

Developing a good root system

Whether growing a tree from seed or from a cutting, you need to develop a good root structure from the beginning. A coarse aggregate should be used in the soil mix to promote duplication of the root system, thus creating fibrous rather than long thick roots. The soil mix also has to be well drained but retain enough moisture to keep the plant healthy.

When re-potting your bonsai or developing tree, remove all thick heavy roots making sure you have left enough finer roots to compensate. Some heavily pot bound trees will take several root prunes over a number of years before all larger roots can be removed. Quite frequently you will come across root spiraling on a tree, with masses of roots wrapped around the root ball. This mess must be cut off to proceed. It may seem quite savage, but if the tree looks healthy above ground, then it should survive the process.

How much of the roots should be cut off? On a developing tree you would generally take off 50% of the root structure, keeping in mind that if it is the first root prune, you may have to take off 60% to 70% to get rid of the root spiraling. On a established bonsai you would generally remove 30% of the root ball.

How often do I re-pot a bonsai?

The rule of thumb is that the older a bonsai is the less frequent you re-pot. A bonsai that is 10 years old may need re-potting every 3 years where a bonsai that is 25 years old will be re-potted every 5-6 years. If you are fortunate enough to own a bonsai 50 years old or over, you will only need to re-pot it every 8 years. Make sure that a large size mesh is used in your bonsai pot to cover the holes, not fly screen. Remember that drainage is extremely important, so don’t forget to have a layer of larger rock at the bottom of your pot.

Soil mix

The soil mix required depends on the species of tree and its needs. The general mix used is 40% organic (decomposed pine bark is often used ), 30% peat and 30% coarse aggregate – such as sifted propagation sand. When potting a pine which needs drier conditions, I would use 60% coarse aggregate 20% peat and 20% organic. Try keep the particle size down, with no large pieces of bark or rock. In Japan and other parts of the world, they use a specially prepared clay called Alkamada. This is used with no other additives, only the particle size will vary for different size trees. Because of quarantine laws, it is very hard to import this product and it’s also not very cost effective. 

Cheers

Chris Xepapas

Heritage Bonsai Tasmania           


Grow Deck mini greenhouse – a tidy and effective garden option

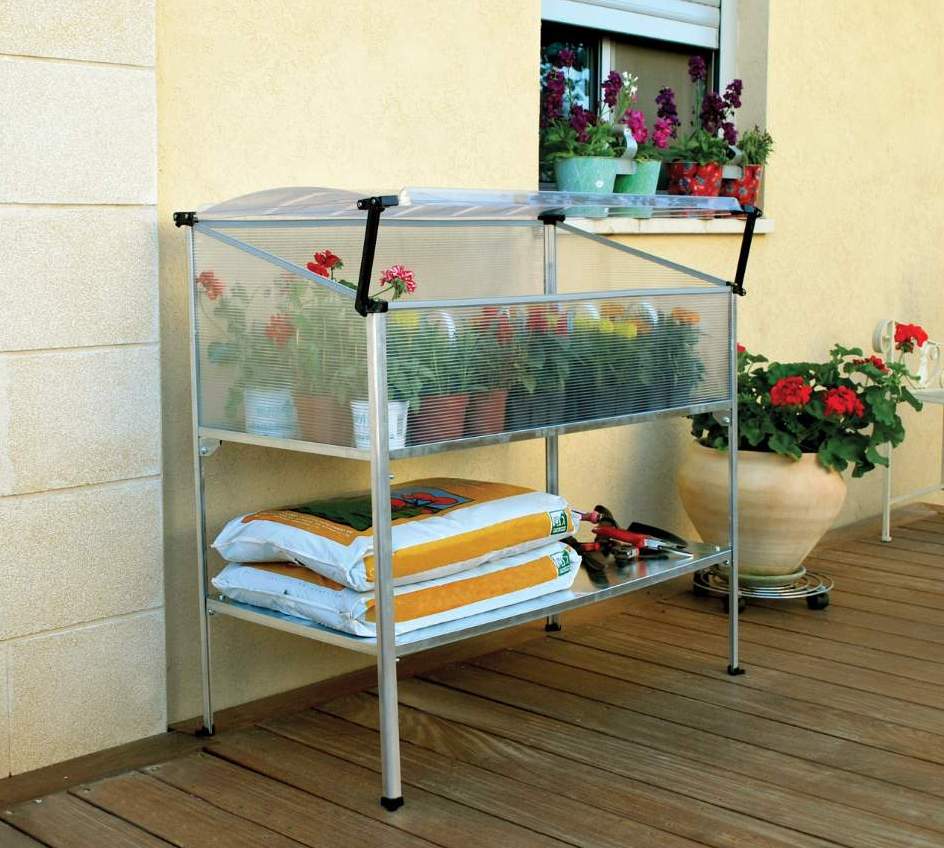
The Grow Deck mini greenhouse from the Silver Line range is a great solution if you are looking for a neat, compact unit to grow smaller flowers and vegetables or to propagate plants in space-restricted areas such as balconies, patios and small courtyards.

GrowDeck_mini_greenhouse

SILVER LINE GROW DECK MINI GREENHOUSE

With its robust aluminium extrusion frame, galvanised steel shelves and glazing of virtually unbreakable polycarbonate, the Grow Deck mini greenhouse is sturdy and easy to access. The clear polycarbonate lid can be set open to allow ventilation during the day, opened fully to allow access and when closed will protect your plants from wind and low temperatures. The Grow Deck also provides protection from birds and pets. The elevated greenhouse deck gives easy access – you don’t have to get down on your hands and knees to look after the plants. The shelf beneath the greenhouse section is adjustable and can be used to store bags of potting mix, fertiliser, garden tools and gloves. The Grow Deck mini greenhouse is supplied as an easy to assemble kit.

Greenhouse gardening is becoming increasingly popular in today’s high-pressure environment. Many people are finding that the process growing and looking after plants is a great way to relax as well as useful source of fresh produce. The Grow Deck is particularly suited to growing smaller plants such as herbs – other units in the Silver Line range can be used for plants requiring deep pots or needing plenty of room for height.


Bonsai does not need a greenhouse – ideal for balcony gardens

In this blog Chris Xepapas explains the process involved in developing a bonsai tree from seed.  He has chosen a Japanese maple as an example – one of the most popular trees for bonsai.

outdoor-trees-bonsai

Japanese Maple – before final potting

Propagation – when planting the seed keep in mind that the rate of the seedlings growth will depend on the size of the container. Remember not to plant the seed too deep as it needs light as well as water to germinate. A good hint is to plant lots of seeds to ensure success; you should get some trees sprouting if you plant several hundred! Keep that in mind that some seeds take longer to germinate than others.

Stage one- when your seedling is around two years old, it is time to prepare it for a life as a bonsai. In the dormant season (towards the end of winter), you must re-pot the tree into a larger growing container. At this stage the tap root has to be cut to allow the side roots to develop. When replanting the tree, you can decide to plant the tree on a angle to start developing any particular style you might have in mind. This eliminates the need to wire the trunk in the future.

Stage two- as the tree grows over the next couple of years, you will need to selectively prune the tree. We need branches coming from certain points of the trunk to fall within bonsai aesthetic designs. As the maple grows you will be presented with junctions of growth which have three shoots in one. The strongest shoot, which is usually the middle one, will have to be removed. It is advised that only two possibilities come from one point. This makes sure that design looks natural and you don’t get unwanted bulges of growth in the upper area.

 The first (lowest) branch can be either extend to the left or right. The second branch should be a little further up and at the back. The third should extend in the opposite direction to the first branch. Next another back branch, and we repeat the process until we reach the desired height for the style. The tree apex also needs to lean slightly forward. Remember, this process will take some years. Every three to four years, the tree needs to be re-potted and the nebari (surface root structure) can be developed .

Stage three- the tree should now be starting to look like a little bonsai. If you are happy with the trees trunk thickness and height, you can pot the tree into a bonsai pot. Be warned that once the tree goes into a bonsai pot, it will slow right down in growth so if you want that trunk thicker, leave it in its larger container.

Stage four- When settled into the bonsai pot you can start to refine the branch structures. Sub branches should be developed off the main branches, on a left/right pattern with spaces between them, never opposite to one another. Then more sub-branches off the sub-branches. This will also take several growing seasons to achieve.

Stage five (final) – the bonsai should be looking great now, but how can we improve it even more?

You might decide that the tree needs changing to another pot to enhance it further.

 Another way to improve your tree is by leaf reduction. This is done by defoliating 50% of the trees foliage during late spring. The new growth that comes out will be smaller – but you should only do this if your tree is healthy.

Lastly let light penetrate the trees inner branches to allow back budding. This is done by:

 1 – Let the first flush of growth in spring grow out to four + pairs of leaf growth, then prune the growth back to the first pair of leaves.

 2 – Two weeks later clip off one of the two leaves left. This will lighten up the appearance of the tree and you should get back budding.

Remember that deciduous trees are best displayed in winter without foliage to show off the branch structure.


Chris Xepapas

Heritage Bonsai Tasmania


Greenhouses have been around for 20 centuries!


Greenhouses have been in use for at least 2000 years. The earliest examples of course were not anything like the polycarbonate plastic greenhouses available today, but the basic concept was the same – to provide an environment which protects plants from the extremes of cold and heat, winds and the damage caused by various pests. Greenhouses are also used to extend a plant’s growing season and even to enable a gardener to grow non-native plants which would not survive in the open.

One of the first known examples of a greenhouse was the ‘specularium’ constructed for the Roman emperor Tiberius, who was advised by his physicians to eat a cucumber every day. This greenhouse apparently featured stone walls and a translucent roof which was made from small pieces of mica to let in the sunlight. Heating was provided by fires burning against the outside of the stone walls.

The modern greenhouse concept was developed in the 1500’s by botanists and collectors interested in propagating exotic species of plants discovered by explorers. An early greenhouse with glass roof and walls was built in Holland by the French botanist Jules Charles who wanted to grow tropical plants. (The Netherlands has certainly maintained and expanded this tradition – huge areas of land are covered by greenhouses and hothouse vegetables and flowers are grown in enormous quantities; if you look at The Hague, Netherlands on googlemaps.com you will see that almost half the city is made up of commercial greenhouses. Visitors to The Hague notice the glow in the night sky of lights which are left on to assist plant growth).

During the 1600’s glasshouses became fashionable with the aristocracy in Europe, and increasingly elaborate and expensive examples where built in various places. The orangerie at the Palace of Versailles constructed during the reign of Louis XIII was over 150 metres long, 12 metres wide and nearly 14 metres high. Of course, the immense cost of such a project was of no consequence to the king, but as glass was very expensive in those times, greenhouses were strictly a luxury item for the very wealthy.

By the mid 1800’s glass was being produced in large quantities and the cost was greatly reduced. Glasshouses became more common and some amazing examples were built. One which still stands is the Palm House in the Kew Gardens. This took 4 years to build and was completed in 1848. It featured an iron framework with open spaces free from pillars and utilised design concepts based on shipbuilding, which was also undergoing the radical change from wooden construction to iron.

Since then design and construction has evolved, and these days greenhouses are readily available in a wide range of types, sizes and price ranges. Frame construction, traditionally using timber, has moved through steel to extruded aluminium sections and glass is often replaced with plastics such as polycarbonate which has excellent light transmission qualities and is virtually unbreakable.


The new Woodland High plastic shed is a winning outdoor storage solution!

woodland-high-plastic-garden-shed

Keter WOODLAND HIGH Vertical Shed

The new Woodland High plastic garden shed manufactured by Keter is a stylish vertical outside storage cabinet with a wide double door opening.  Constructed from quality UV-stabilised polypropylene resin, the Woodland High is a sturdy and secure solution to storing household items outside. The unit is easy to assemble using commonly available tools and is virtually maintenance free because it will not rust, dent or peel.

Another major advantage of the Woodland High plastic shed is that the floor panel is an integral part of the structure – you don’t need to have a concrete slab to install it on to provide dry, weatherproof storage. The double door has a clear opening of 1300mm and the bolt is lockable and the wall panels have an attractive wood grain appearance.

The Woodland High is on special at Landera for the month of September – so it is well worth looking at while the going is good! Plastic sheds are an attractive alternative to the more common metal shed.

Outdoor storage is becoming an option that more people are considering and using. It simply makes sense to free up valuable storage space inside the home by moving toys, sporting equipment, garden gear etc, into a weatherproof and secure location outside. The available range of suitable outdoor storage boxes, benches and cabinets, as well as garden sheds provides for practically any situation and need. The units currently on the market are not only useful, they are an attractive addition to any outside space.


Adding bonsai to balcony gardens – what tools do you need?

In this blog, Chris Xepapas from Heritage Bonsai discusses the tools you need to create and maintain bonsai. While there is quite a selection of specialised tools which have been developed for use with bonsai, most can be improvised from common garden or household implements. Bonsai tools are readily available online – check out www.stonelantern.com and www.orientbonsai.com.au for pictures and pricing of the items described in the blog.  landera_bonsai_blog

BONSAI – AN INTRODUCTION – PART 5

There are many tools used for bonsai creation and maintenance. I will list both bonsai tools and alternative tools that can be used that are readily available and more affordable.

Scissors – There are many varieties of scissors with different purposes for bonsai. General purpose trimmers include:

  • Long handled scissors which allow the user to get in amongst the branches without their hand breaking any delicate parts.
  • Leaf trimmers- used to defoliate a tree.
  • Root shears – used to cut roots when repotting trees.

All the above scissors can be replaced with ordinary household scissors, although the effectiveness of the job will be reduced.

Branch cutters – available in different sizes and used to remove branches. These can be replaced for most purposes with a pair of secateurs, although this will limit how close you can cut to a trunk line.

  • Knob cutters – used to remove stubs left when a branch is cut off. Unfortunately, there is no tool that can replace this one. Sometimes called a concave branch cutter, it is almost like a surgical tool because it is extremely sharp and precise. It can cut right up to the trunk of the tree, leaving no snag at all.
  • Wire cutters- designed to remove wire. You can use general wire nippers but care must be taken not to damage the bark.
  • Jin pliers- used when creating jin (dead branches ) on bonsai. Any pliers can be used.

Bending jacks – specialized bending tools/clamps used to bend thick branches and trunks.

There are many more tools for specialized jobs but the above are the essentials for bonsai work.

Accessories

  • Heal paste – this comes in various brands and types. It is applied to open cut wounds to aid in the healing process, and also used to prevent rot on bare wood.
  • Raffia – for protecting bark on a tree when heavy wiring and bending is required.
  • Fertilizer – also available in many forms but be warned – apply it in diluted doses.
  • Pots- once again, available in many forms and depending on your style, and tree species, depends on what pot you use. Generally a conifer would require a earthenware pot, whereas a maple would look good in a glazed pot.
  • Turn table or lazy Susan – used when working on a bonsai and allows you to spin the tree around freely and effortlessly. Available in many sizes and types; generally a cheap $10 turn table will do the job .

Most tools and accessories can be substituted with every day garden tools but the fact remains that the Japanese tools are superior and a pleasure to use. I would strongly advise NOT to use Chinese bonsai tools. They are crude at the best of times and you would risk damaging your trees.

 Cheers

Chris Xepapas

Heritage Bonsai Tasmania


As an interesting garden accent, weathervanes are worth considering

weathervane_ship

ACCENT Clipper Ship Weathervane

The ACCENT weathervanes are a great addition to any property. Manufactured from cast recycled aluminium with a black powdercoat finish, they will last a life time.

A customer from South Australia has recently installed one and writes:

“I bought this weather vane for my wife and we are really happy with it. We installed it on a small wooden archway in our garden. Being put onto wood the installation was extremely easy, 4 tek screws and I was done. The base has a good design that allows it to open to any angle and has slots rather than holes which allow for better placement of your screws.

It is sturdy, has the same level of detail on both sides and the size is just right. As they describe, it will never rust and the coating is very good quality as well. It won’t turn in very slight breezes, but a reasonable puff will move it to show the general direction the wind is blowing.

I’m very happy with the purchase and the quick delivery time – couldn’t find the same thing for a better price anywhere else either”.

Weathervanes have actually been in use for thousands of years, and for centuries were an important indicator for forecasting coming weather patterns. With the advent of modern forecasting techniques and technologies they have largely been superseded of course, but they remain an interesting link with nature and conversation point.  


Bonsai for balcony gardens – wiring techniques for shaping

Bonsai has been described as “a curious mixture of horticulture and art”. As well as the basic horticultural principles needed to maintain a tree in a healthy condition, there is also a number of special techniques used to transform ordinary trees and shrubs into works of art. These include pruning, shaping and wiring. This week, Chris Xepapas discusses wiring techniques.

bonsai_wiring_blog

Shaping a tree using wiring techniques

BONSAI – AN INTRODUCTION – PART 4

Wiring is necessary for shaping and styling bonsai. Wire comes in a number of gauges and qualities. Your skill level it will determine on what gauge you use; the larger the gauge, the harder to bend without damaging the bark on a tree. It normally takes one full growing season to set a branch into a desired position, but if a particular branch needs to be wired for a second year, it is good practice to remove and rewind the wire so that the bark is not marked too deeply.

GAUGE SIZES

G1- Fine wire for wiring very fine branches and putting the finishing touches on bonsai for display.

G1.5 – As above, a little stiffer

G2, G2, G2.5, G3, G3.5 – These gauges are the core selection and will do the majority of your shaping

G4, G4.5 – Heavier gauge wire for main branch and small trunk bending

G5, G5.5, G6 – The heaviest gauges for heavy trunk and branch bending. Hard to use and protection on the tree such as raffia is recommended.

If branches do not bend with G6 wire, we use special techniques to bend branches and trunks using brace wires and clamps.

Bonsai wire is made of aluminium with a copper coating as so the tree does not react to the aluminum. The quality of the wire will also influence the result you get, especially at a beginner level. The cheaper wire, which is often Korean or Chinese, is a little harder to bend into place. It is also considerably cheaper. Japanese wire is best but can be pricey.

When applying the wire, it is important to remember some rules:

1- Do not wire the bonsai too tightly, you will damage the bark and scar the tree. If the wire is too loose, the effectiveness will be reduced dramatically. With practice, you will learn in time how tight to wind the wire.

2 – Do not cross wires when wiring. If the wire is left in place too long, it will result in ring barking that part of the tree. Wire in the same direction as any other wire to avoid this. Crossing wires also creates a pressure point, thus scarring the tree.

3 – When using heavy gauge wire or making large bends, use a protective film wrapped around the area wiring. Raffia or rubber tubing in most acceptable. We do this to reduce scarring from the heavy gauge wire and also to keep the cambium layer of the bark firmly connected to the wood of the tree.

On a finishing note, it is not good practice to reuse wire. It is almost impossible to straighten out the wire once bent and when trying to reapply the used wire, it will not wind correctly and risk damaging the tree. It is also advisable to use specially made bonsai wire cutters to remove the wire .

I strongly recommend that at a novice level, you practice on a spare branch on a tree in your garden – with time your wiring skills will improve.

 Cheers

Chris Xepapas

Heritage Bonsai Tasmania


Glass and polycarbonate both have advantages for use in greenhouse glazing situations. So which is better overall?

Traditionally, greenhouses have been glazed with glass – glasshouses in fact. In recent years, however, advances in technology have resulted in the development of plastics such as acrylics (e.g. Perspex) and polycarbonates (e.g. Lexan or Suntuf) which are often used in glazing applications. Polycarbonate is widely used because it has a combination of high impact strength and clarity which no other plastic or glass can match.

SP_Americana_12x12_main_1887

Polycarbonate glazing – SILVER LINE AMERICANA

So which is better for glazing a greenhouse, glass or polycarbonate?

Glass offers visual clarity and can last indefinitely in fully protected situations. However, it is heavy and this necessitates very strong frame design, typically with a large number of relatively small panes. This can result in maintenance issues with seals and gaskets perishing and leaks occurring. Glass is also susceptible to breakage from hail, balls, stones etc. and is expensive to replace.

Polycarbonate is virtually unbreakable, having an impact resistance 250 times that of glass. The video at http://landera.com.au/greenhouse illustrates just how tough it is. It is also light, which enables larger glazing panels to be used and reduces the need for heavy and bulky frame structure. Not all grades of polycarbonate are suitable; it is important to ensure that a good quality UV protected polycarbonate is used, and that product guarantees are offered. Whilst a UV protected polycarbonate has a service life of 15 – 20 years, a poor quality product will not last for more than 3 or 4 years in typical Australian conditions.

The question of aesthetics is also important to many people, and there is no doubt that the top end of the market where price is not so much of a consideration is still dominated by the traditional glasshouse. From a value for money perspective, however, it seems that polycarbonate is a clear winner! 

But cost aside, there are some amazing glasshouses out there. Anyone who loves gardening and glasshouses should check out the Kew Gardens in the UK – see http://www.kew.org/visit-kew-gardens/garden-attractions-A-Z/glasshouses/ .


Bonsai for balcony gardens – an overview of bonsai styles

This week’s article about bonsai as a feature in balcony gardens focusses on the recognised styles of bonsai trees. Bonsai is a highly developed art form, and over the centuries practitioners have found it convenient to classify bonsai into broad divisions based on their appearance. Remember that the object of bonsai is to create a picture using real living trees; just as a landscape painter tries to capture a panorama on a small area of canvas, so a bonsai artist is attempting to produce a miniature which replicates a fully grown tree. Bonsai styles offer a structured framework which assists in this.

BONSAI – AN INTRODUCTION – PART 3

There are five basic styles:

  •  Formal upright (Chokkan) – must have a straight trunk and can be the hardest style to get correct because of its strict prerequisites.
  • Informal upright (Moyogi) – the most popular and easiest style to develop; requiring the tree to move any way as long as it reaches upright.
  • Slanting style (Shakkan) – as it sounds, the tree slants across the pot on a lean
  • Semi cascade (Han-Kengai)- this style requires the apex of the tree to lean below the rim of the pot but no further than the bottom of the pot.
  • Full cascade style (Kengai)- the tree must lean over the pot and down past the base of the pot.
bonsai-heritage-3

Han-Kengai (Semi Cascade) Style


Other styles which are recognised include:

  •  Twin or triple tree plantings (Soju) – basically multiple trees planted together in a natural setting
  • Forest planting (Yose-ue) – when creating a forest bonsai, the number of trees used should be in odd numbers, starting at 5, 7, 9, 11, etc.  If looking down on a pot there should not be vertical or horizontal lines of trees, diagonal is an exception, thus when viewing a forest, no tree is in front of another.
  • Root over rock (Seki- joju) – a tree is planted over a desired rock at a young age and over time the roots become attached to the rock and when planted into a bonsai pot, the roots and rock are then revealed.
  • Exposed roots (Neagari) – as it sounds, a tree has its roots exposed over a period of time; this represents a tree growing on a river bank that frequently endures the hardship of floods.

 There are other variant styles of bonsai which may incorporate two different styles in one but those described above are the source styles.  The subject of bonsai styling fills whole books – this article is just a very brief overview.

 Chris Xepapas

Heritage Bonsai Tasmania


Keter’s new PACK & GO is great value for money in outdoor storage box solutions.

keter-pack-n-go-outdoor-storage box

KETER’S new PACK & GO outdoor storage box

 Storing household items such as toys, sporting equipment, garden tools – the list is almost endless – is always a challenge. There never seems to be enough shelf and cupboard space inside the house! Outdoor storage box units are a great solution to the problem – weather proof storage space that can be put almost anywhere.

The new KETER PACK & GO outdoor storage box is one of the best available – a high quality unit manufactured from injection moulded polypropylene resin, a plastic specifically formulated for outdoor use. With its built-in handles and wheels it is easy to move, and its design keeps the contents dry and ventilated. The lid is lockable and the unit is quick and easy to assemble. It certainly isn’t the very cheapest on the market, but its robust construction and quality of manufacture offer an unbeatable value for money proposition.


Bonsai is a great opportunity for balcony gardens

Welcome back to the ‘Introduction to Bonsai’ blog with Chris Xepapas, an expert with many years experience and a real passion for bonsai. This week Chris is focussing on the types of trees used for bonsai – interestingly these include native Australian tree types which are not always highly regarded as suitable bonsai material.

bonsai-heritage-2

Port Jackson Fig bonsai


BONSAI – AN INTRODUCTION – PART 2

In this week’s blog we will discuss various species of trees which are suitable for bonsai.

Australia has a vast array of bonsai species available in both native and exotic varieties. It has been a misconception that Australian varieties cannot be trained into traditional styles of bonsai; I find this is false and have had lots of success with these trees. One trick to success with developing a bonsai tree is to know the variety’s growth habits and requirements.

EXOTIC TREES (Non Australian)

Japanese pines: black, white and red – these three species of pines are great for bonsai and have been used for many years in Japan and all over the world. They are readily available at specialist nurseries or can be grown from seed or cuttings.

There is also lot of literature  to assist you working with these varieties.

Swiss mountain pine – this tree is a slow growing plant and is suited to growing in containers. A very forgiving plant and is easily grown from cutting or seed.

Japanese maple and Trident maple – absolutely beautiful in autumn with a wide range of colors. Easily obtainable from any nursery.

Junipers of all varieties – these trees can give you some of the most interesting results with bonsai as their trunks can be twisted and bent to make some stunning trees. The foliage pads can also give a sense of age. Junipers require a little more care in developing.

Cypress varieties – similar to the junipers, but a lot faster growing and easier to look after. Very easy to acquire at any garden centre.

There are thousands of species that be used but the above are the most popular.


NATIVE TREES

Banksia varieties – very impressive trunk growth and texture even at a young age. They suit pot growth very well but best trained from a young tree if trunk movement is required in the design.

Tea tree varieties – a wonderful tree to bonsai and very forgiving. Lovely aged looking bark from a very young age and nice small foliage. Hard to wire heavier branches so best to wire young branches before they fatten up; also can be a little thirsty with water. A must have bonsai.

Port Jackson figs – see photo – an Australian fig variety which is easy to grow. Don’t be turned off by the large leaf because as it is manipulated into a bonsai; the leaf size will decrease dramatically as the photo above shows.

She oaks – pine-like appearance in both trunk and needle texture. A little harder to work with, but with time can become a great bonsai.


Of course, the type of trees which are readily available will vary from state to state – but there is a great range of species available which can be developed into beautiful bonsai wherever you live.

Next week we will take a look at the traditional bonsai styles – these have been developed over centuries and are used as guides to shaping, appreciating and judging bonsai.

Chris


Balcony gardens are often used by people in apartments and units

Living in apartments and units is the lifestyle of choice these days – for many proximity to work and recreational opportunities as well as low maintenance are a priority. As with most things in life, this involves a trade-off – in this case, limited space for storage and activities such as gardening are part of the equation. There are many options available to help optimise space usage, such as weather proof outdoor storage units which can sited on patios and balconies, and also a number of mini greenhouse units for those who want to grow their own vegetables and flowers. We can look to other cultures for a few ideas also!

Living in smaller spaces is the normal way of life in many European and Asian cities – and people with an interest in gardening have long since developed and maintained balcony gardens or small gardens in a courtyard or patio. Bonsai has been an integral part of balcony gardening for decades; the fascination of a real living tree which is only a few centimetres high is something few people can resist, and surprisingly, bonsai are not difficult to care for if you observe some basic rules.

Bonsai expert Chris Xepapas of Heritage Bonsai has agreed to share an introduction to the art of selecting and maintaining bonsai – we will be publishing this over the next few weeks, so keep in touch! 

 Bonsai cotoneaster

BONSAI – AN INTRODUCTION – PART 1

What is bonsai?

When pondering this question we often think of little trees in small pots and how we would love to have one! But is bonsai merely a tree in a pot?

The word Bonsai translates as a “tree in a pot or shallow dish”, but does the definition stop there? Can we just plant a tree and call it a bonsai or is it merely a stick in a pot?

The answer to that is not a easy one. Bonsai is a tree in a pot which follows a set of principles that have been developed over a thousand years in China and then perfected in the last 300 or so years in Japan. The level at which we choose to follow bonsai will determine the quality of bonsai we ultimately own; in other words the time we put into a bonsai in all developmental stages will determine the end result.

Acquiring a bonsai can be done in several ways. The first and most obvious way is to visit a specialist bonsai nursery and purchased a bonsai ready to go. This has its advantages and disadvantages. You can have a instant bonsai with great enjoyment, lots of support from the specialist bonsai nursery, and possibly aftercare. This situation would suit professionals who don’t have lots of spare time on their hands. The quality of the bonsai would vary greatly depending on price and the skill level of the nursery.

The second way to acquire a bonsai is to do it yourself; that is to purchase or dig up the appropriate material (yamadori) and create a bonsai from the “raw stock” and then pot it into a bonsai pot. This requires a whole new set of skill levels which in turn can give the beginner a great sense of achievement. This method is by far the most popular method.

The third way is to propagate your own tree from seed or cuttings and slowly grow the tree over a number of years, training the tree through wiring and pruning as it grows. This is the best method to use if you are seeking perfection, but obviously it takes the longest time to produce a bonsai.

Bonsai come in various shape and size categories. Size can range from miniature to one metre high. Styles can also differ from formal upright to full cascade. I also get asked, what tree do you use for bonsai? Quite simply any tree or shrub that produces wood can be bonsai, but of course some species are more suitable than others. My advice is to go with what attracts you the most; for example, if you come across a pine tree at a nursery that has a nice curve or a good set of branches that you find appealing then that’s the tree to buy!

Want to know more? In the next blog I will discuss the popular styles of bonsai, sizes and species used around the world, as well as our own Australian varieties.

Cheers

Chris


Unbeatable value on outdoor storage cabinet, KETER’S COMPACT SHED WITH PEGBOARD

Trying to find a good quality compact weatherproof outdoor storage cabinet? Every so often a manufacturer comes up with a product that just ticks all the boxes – and the COMPACT STORAGE SHED WITH PEGBOARD from the global manufacturer Keter is one of these.

A hugely successful product internationally, the COMPACT SHED WITH PEGBOARD is an ideal synthesis of a great design, high-quality materials and excellent pricing. If you need a unit for storing mops and brooms as well as hand tools, buckets, cans etc, it provides a neat and tidy solution. Interestingly, many people use the COMPACT SHED as a storage cabinet inside the house, although it is designed for weatherproof outside storage use.

Manufactured from UV-stabilised plastic poly resin, the COMPACT SHED WITH PEGBOARD is easy to assemble and designed to take all the punishment the elements can throw at it. The manufacturer recommends fastening the unit to the floor and also to the wall if possible; this is not essential, but it does give added stability and security.

Of course, there are many other options available if the COMPACT SHED WITH PEGBOARD doesn’t offer the outside storage confiuration you need. Other products from Keter such as the BIKES BINS + MORE, the STORE-IT-OUT XL and the WOODLAND 30 are designed to provide outdoor storage for more bulky items such as wheelie bins, lawn mowers and sporting equipment. And there are also a number of outdoor storage boxes and benches such as the new Keter BORNEO STORAGE BOX and the STORAGE BOX WITH SEAT. Check out Landera’s OUTDOOR STORAGE range for more details.

keter_compact_shed_with_pegboard